Gurujee Astro is an online consultation app for astrologers and customers. In this app, anyone can create an account and consult with the astrologers via video calling or audio calling. It can also be called as AstroTalks Clone App.
In this article, we will guide you on building the Gurujee Astro app on your computer.
Pre-requisites:
- You need to purchase Gurujee Astro script from either India Web Designs or Code Canyon.
- You need to have flutter framework installed on your computer.
- You need to have android studio.
- You need to have a domain & a hosting account. We recommend you to get the hosting from WeBotApp Cloud or Hostinger.
Step 1: Purchase, Download & Extract The Source Code.
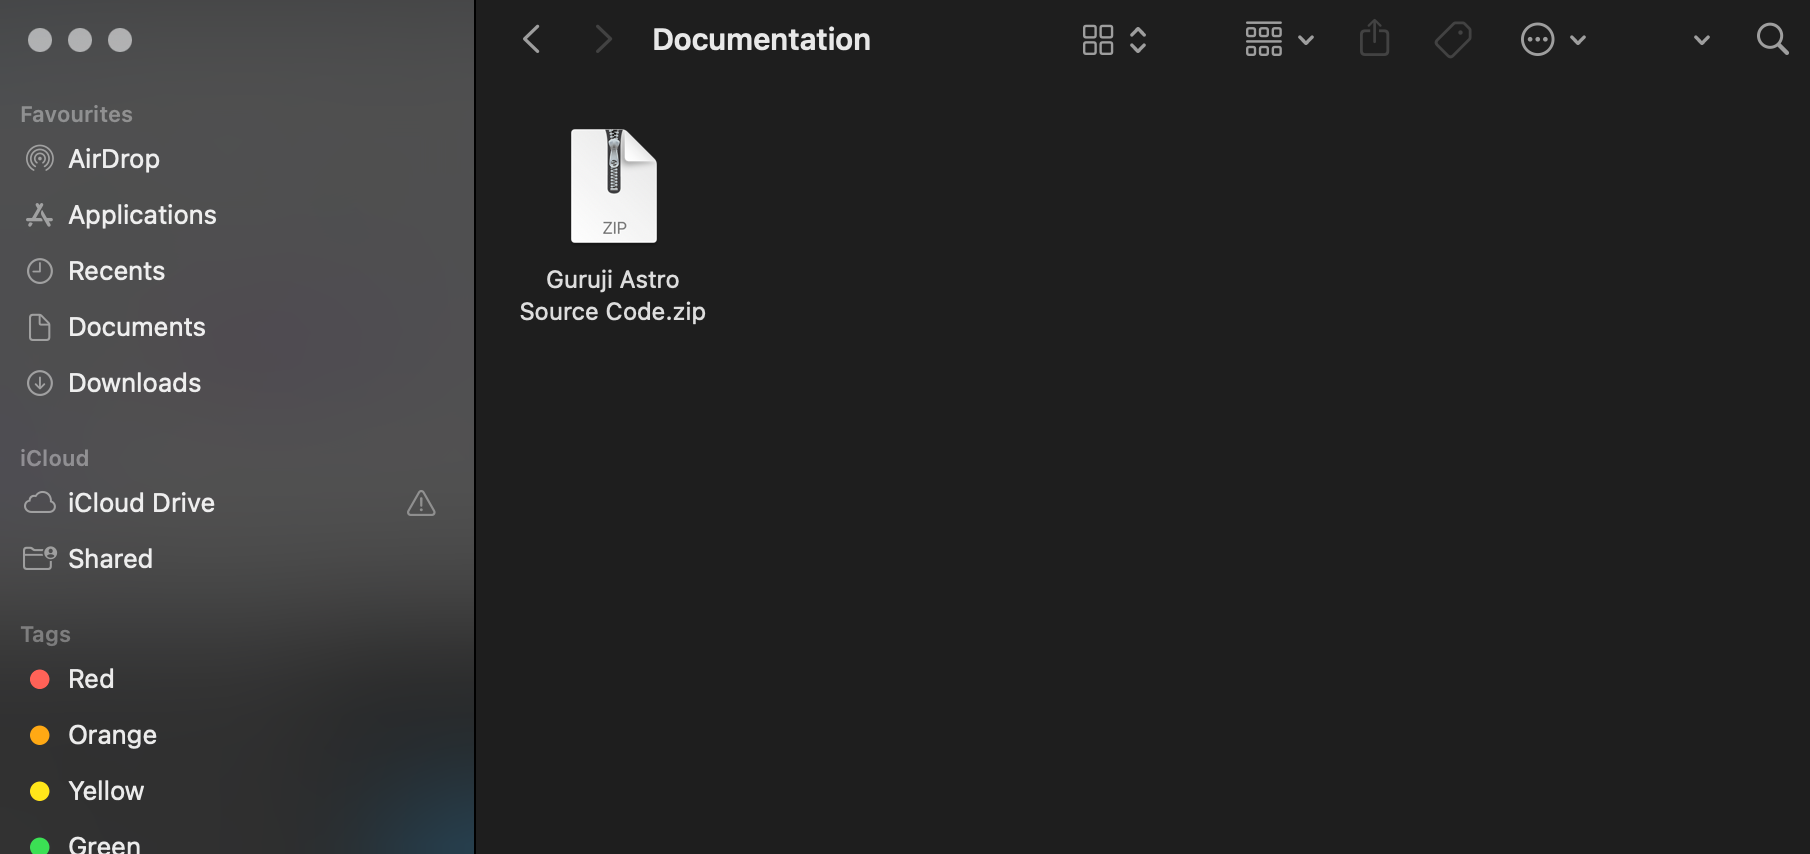
- Download the source code and extract it.
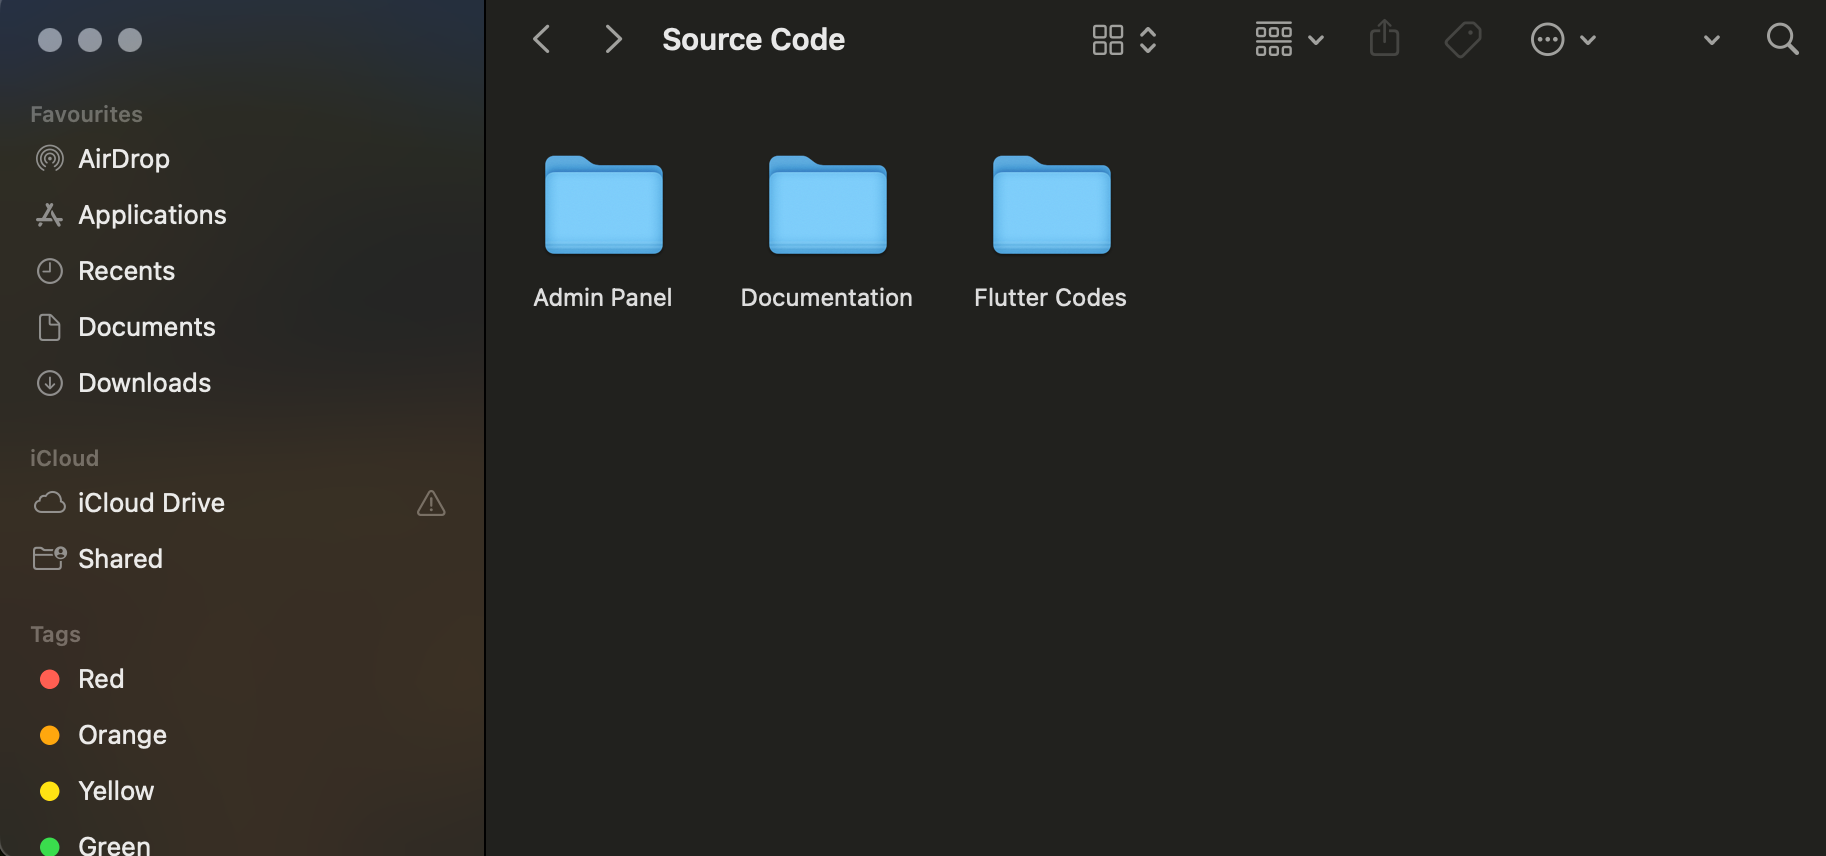
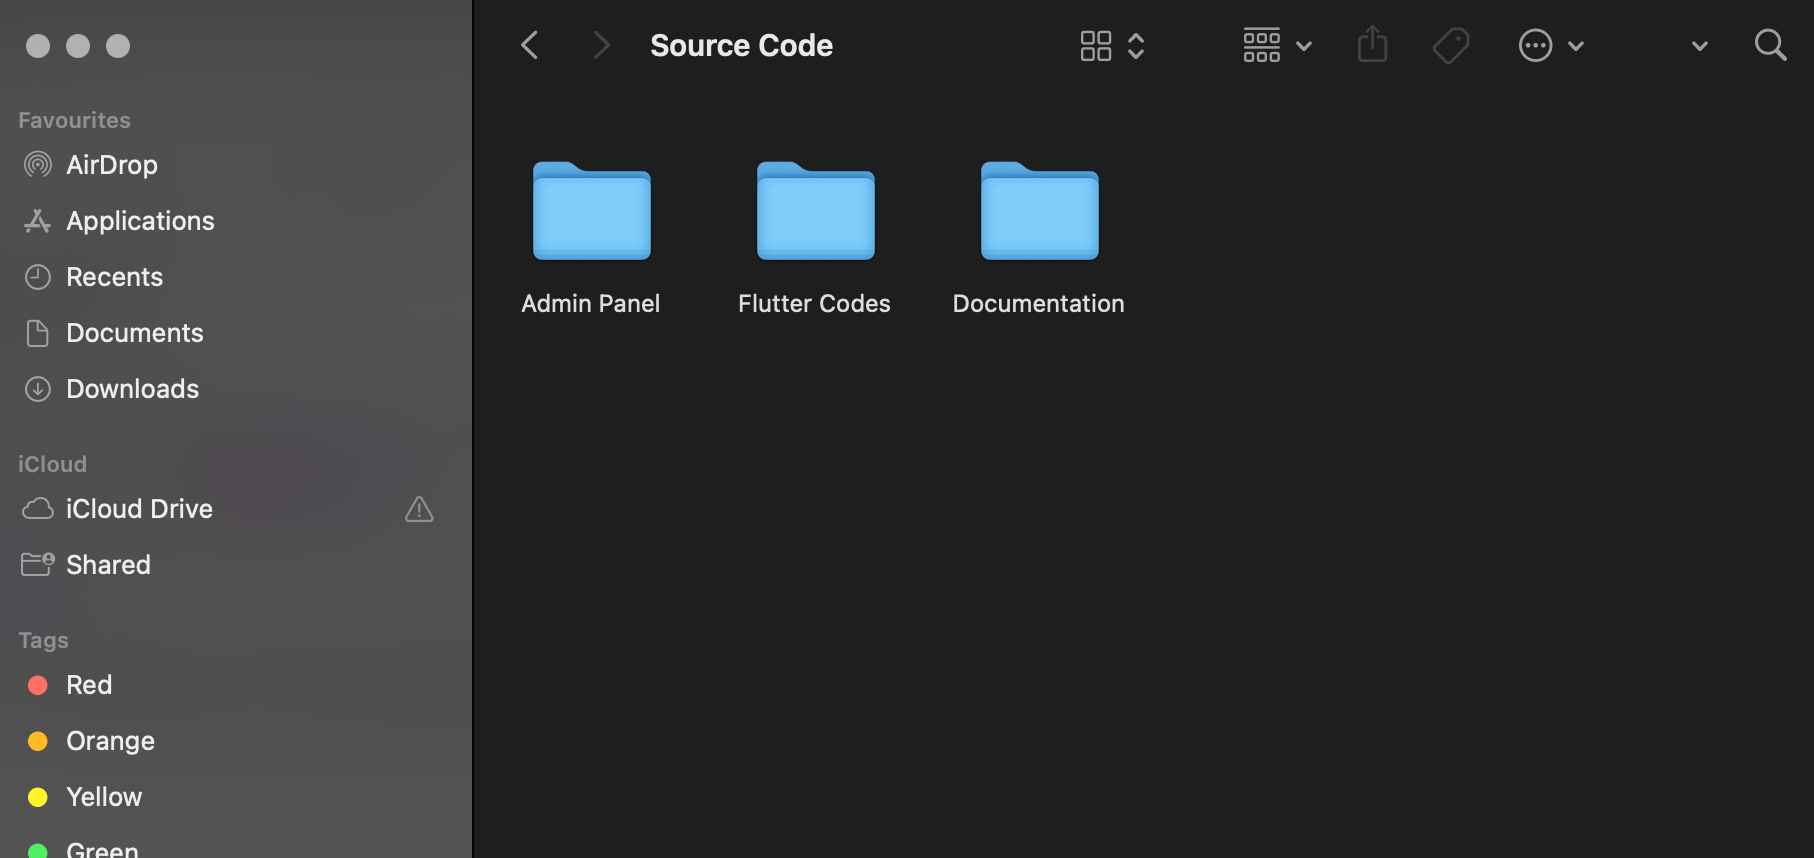
- Once done, you will find three folders. Admin Panel, Flutter Codes & Documentation.
Step 2: Open the Admin Panel & Upload it to your server.
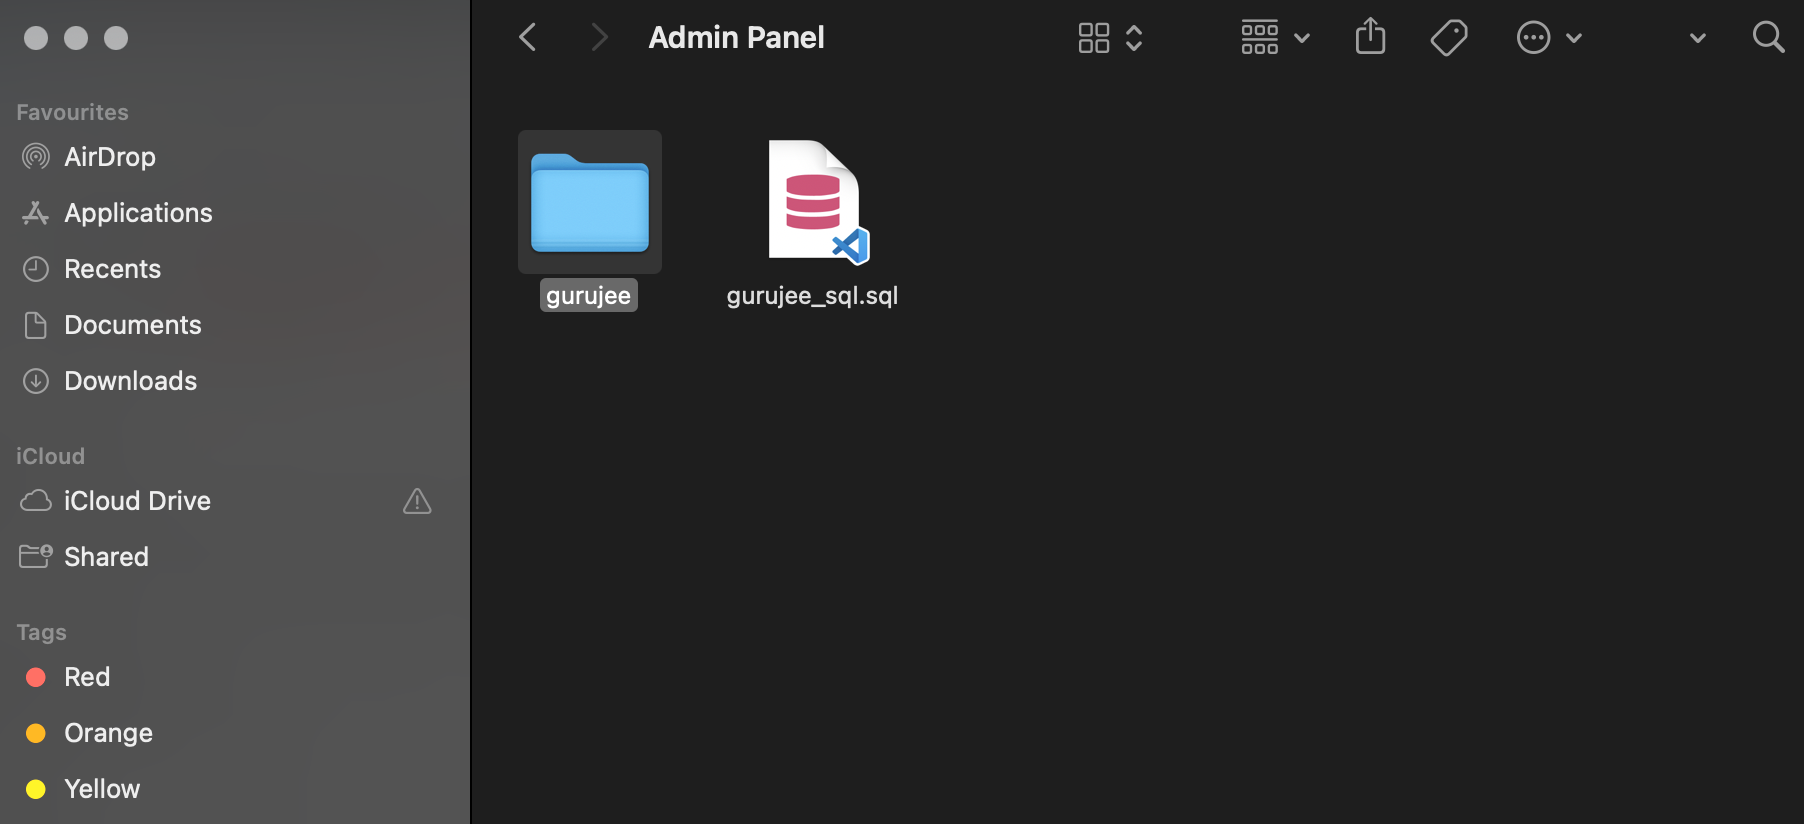
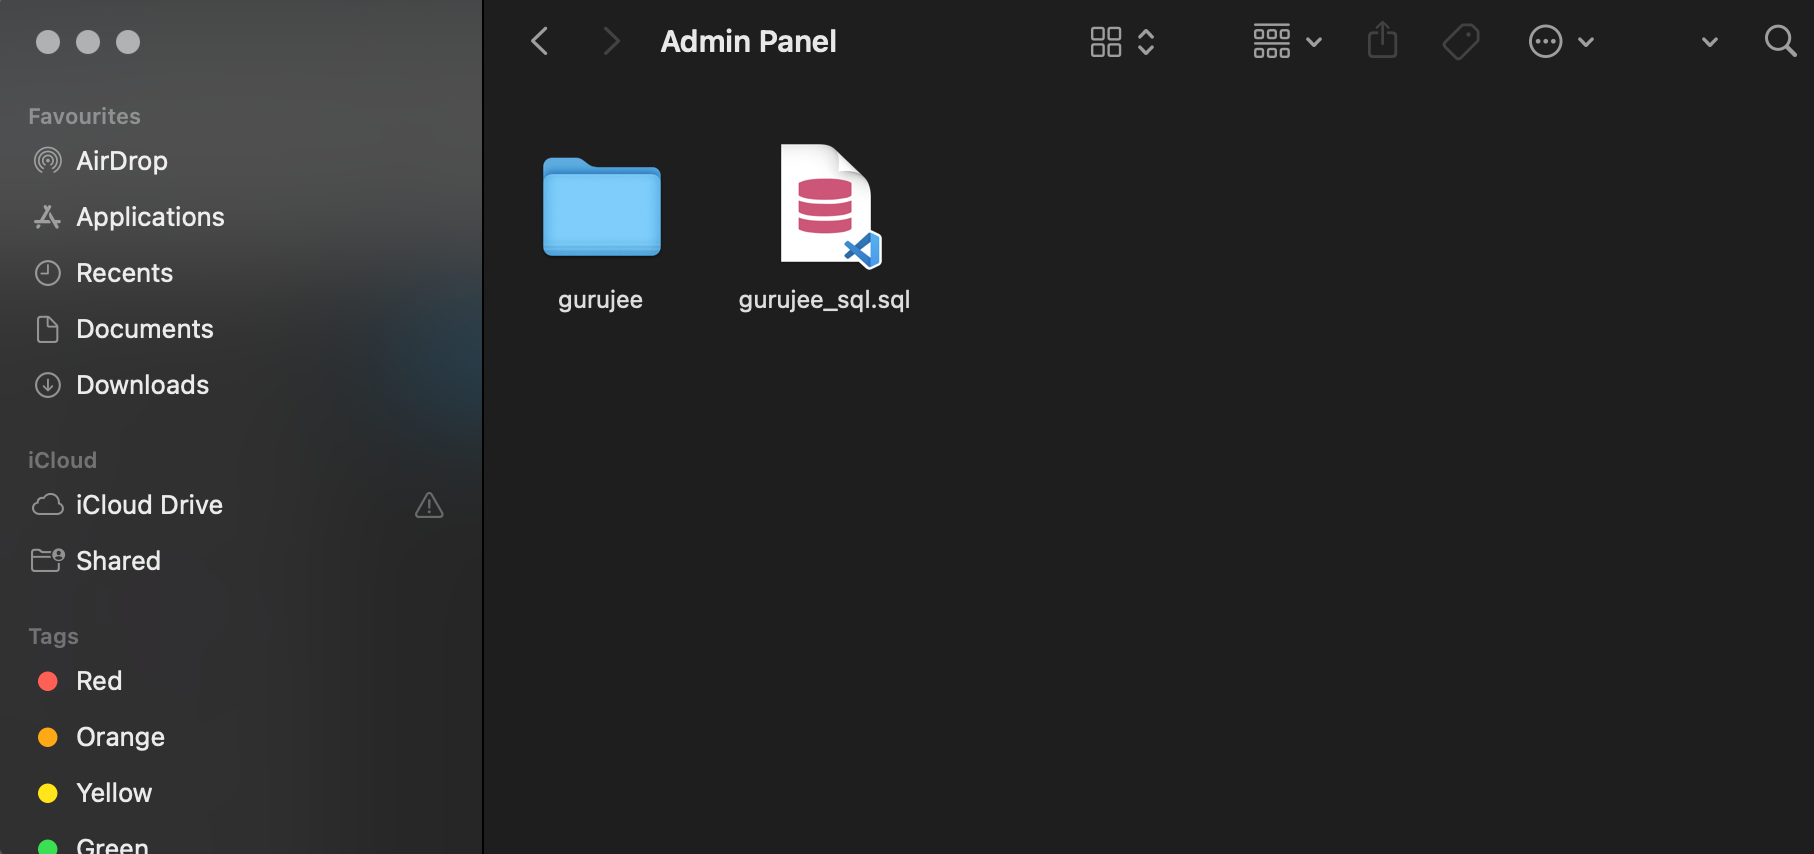
- Once you double-click on the admin panel folder, you will find one folder and one SQL file.
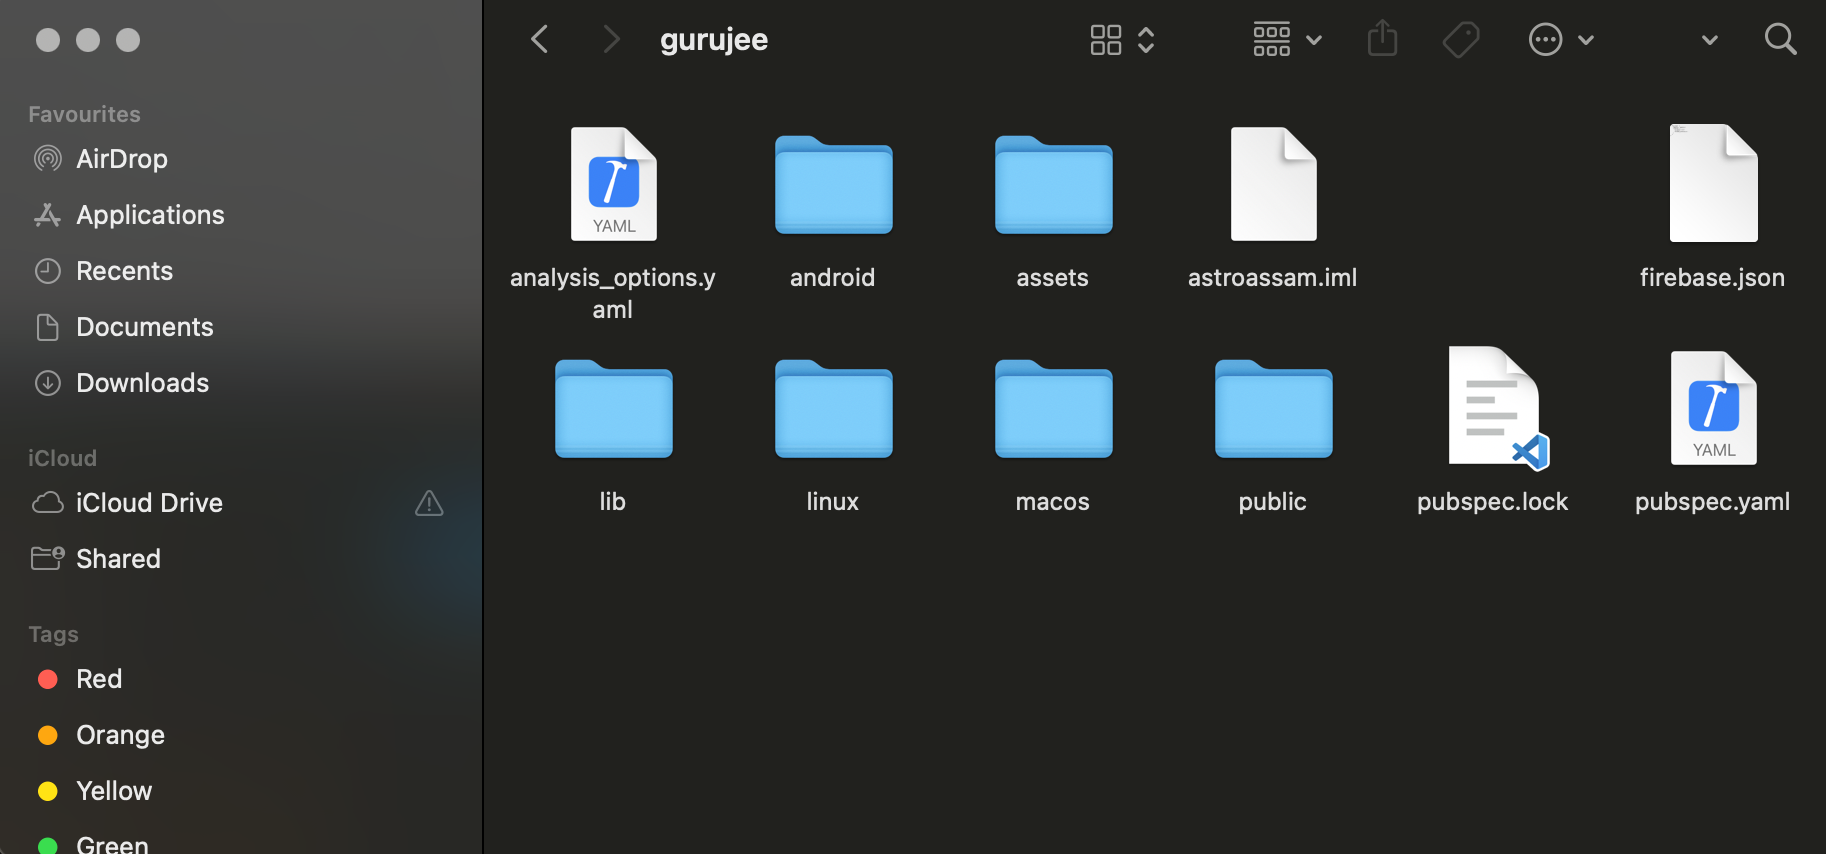
- Once you double-click on the gurujee folder, you will find several folders and files.

- Upload all the files inside Gurujee folder to your server
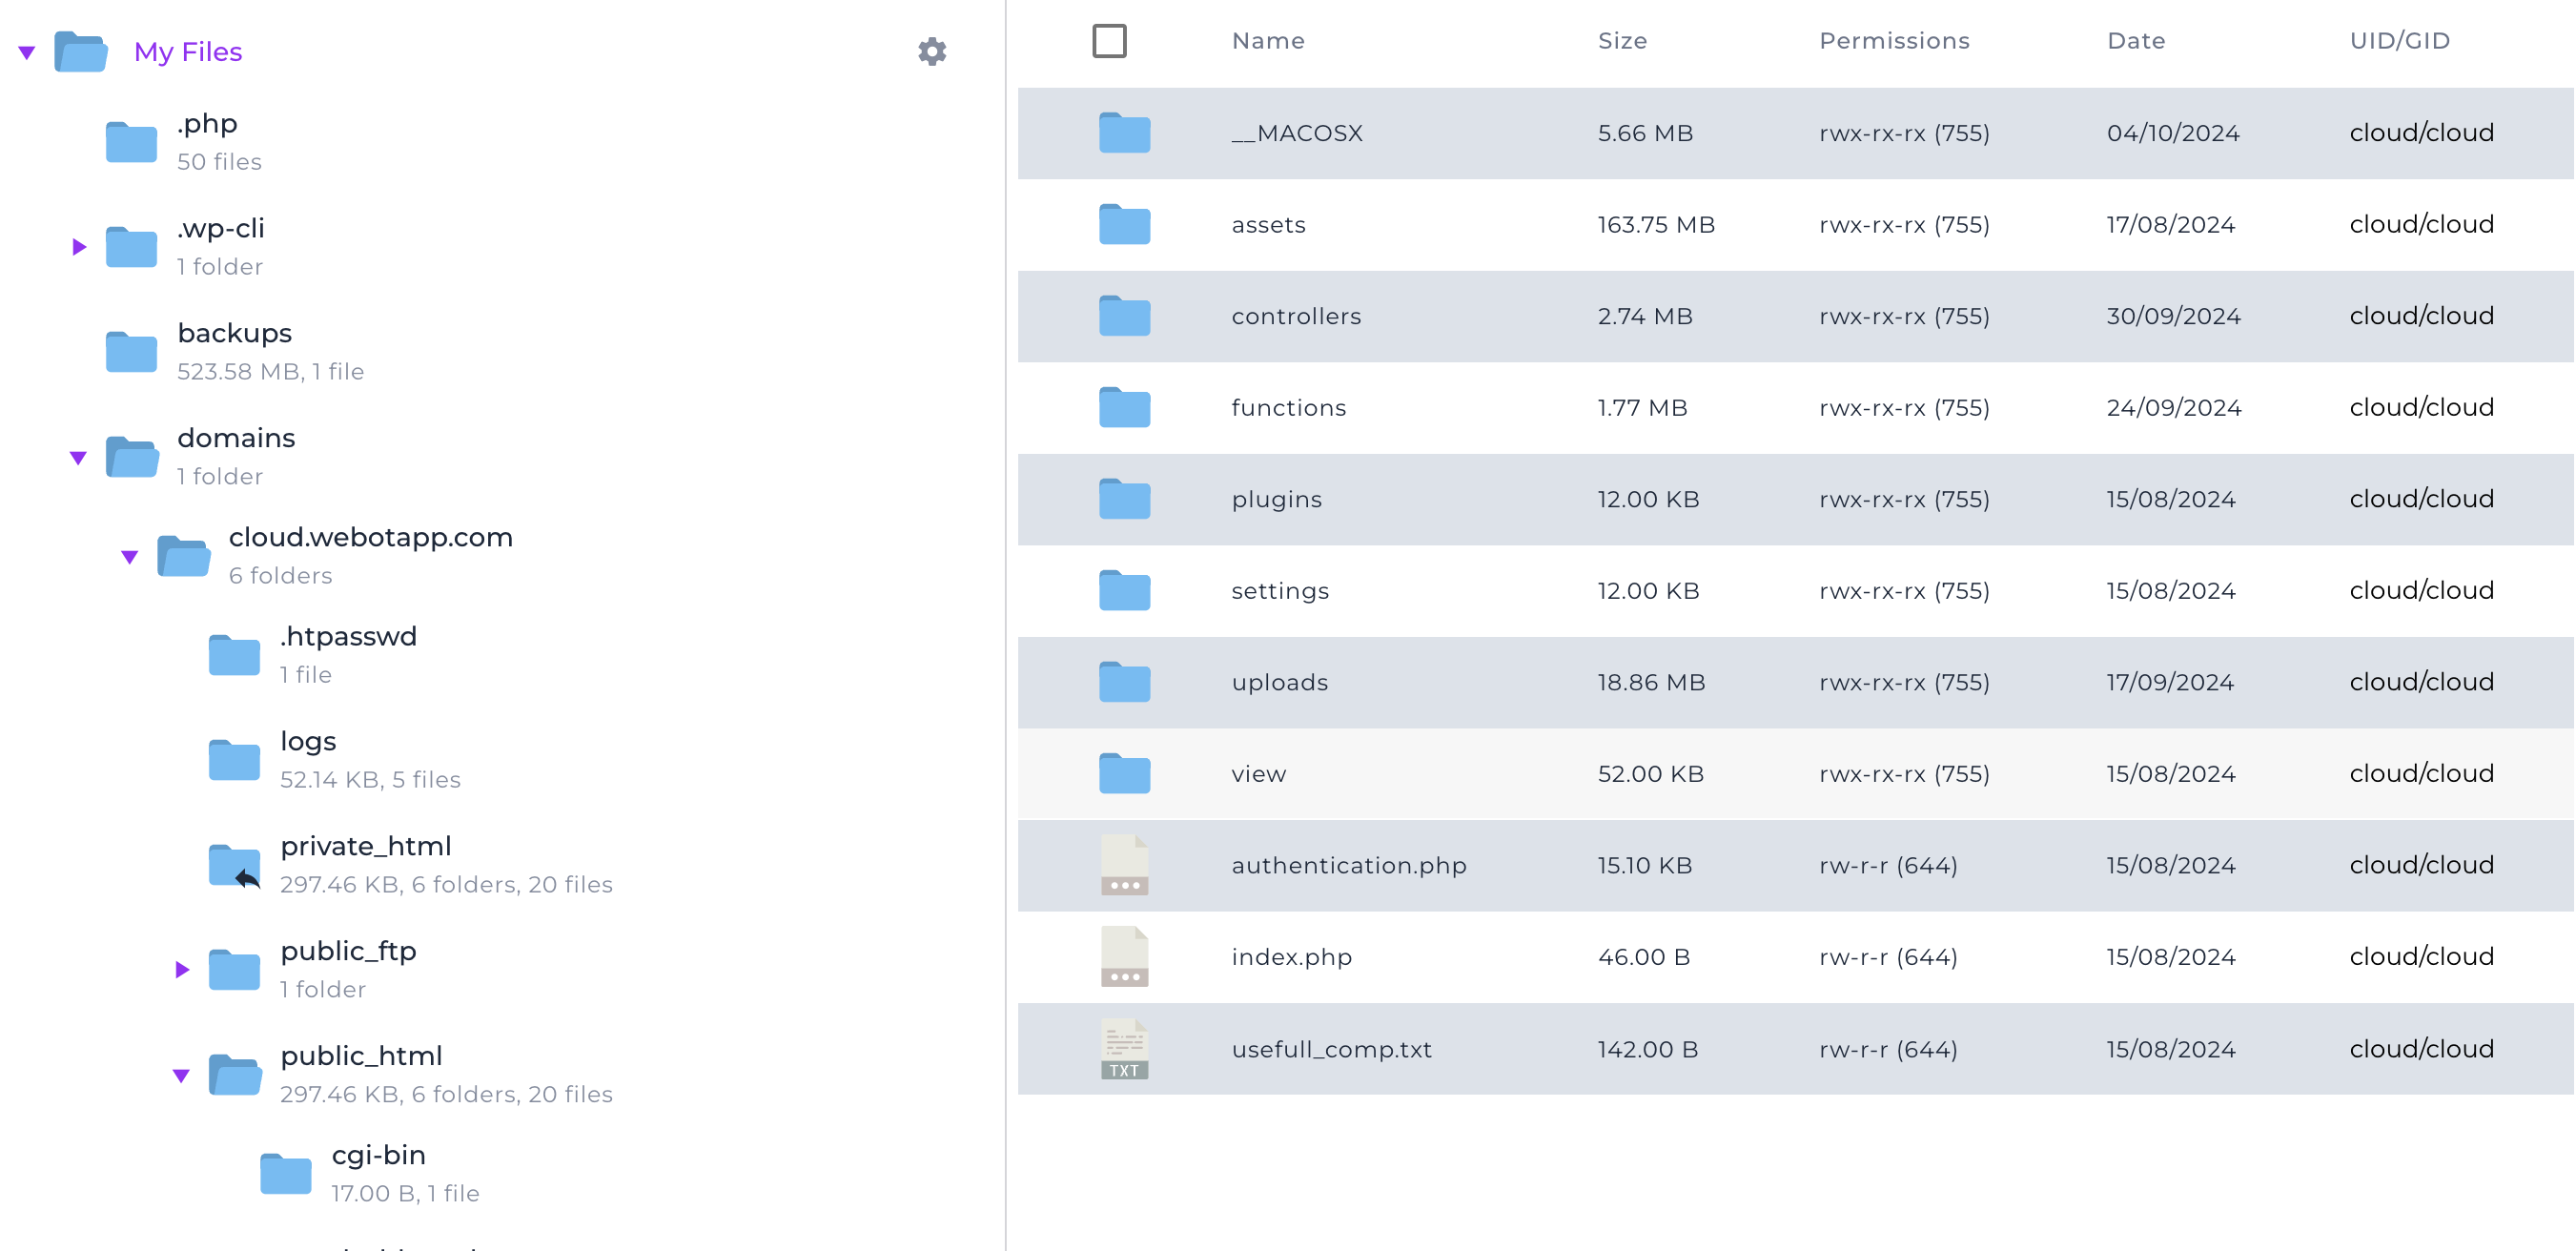
Step 3: Create A Database and Import SQL File.
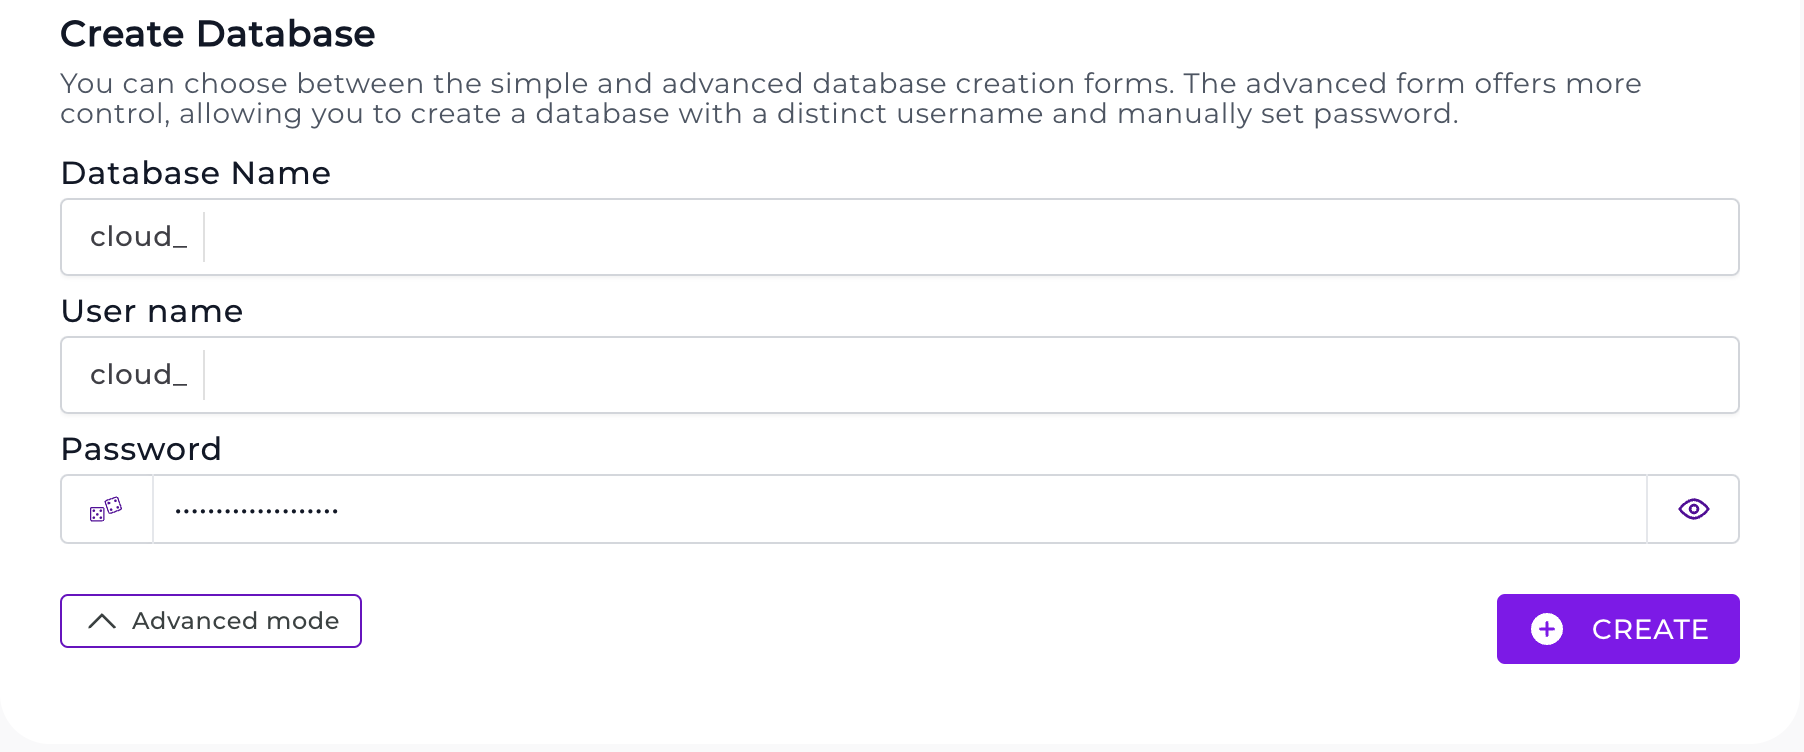
- Create a MySQL database in your hosting

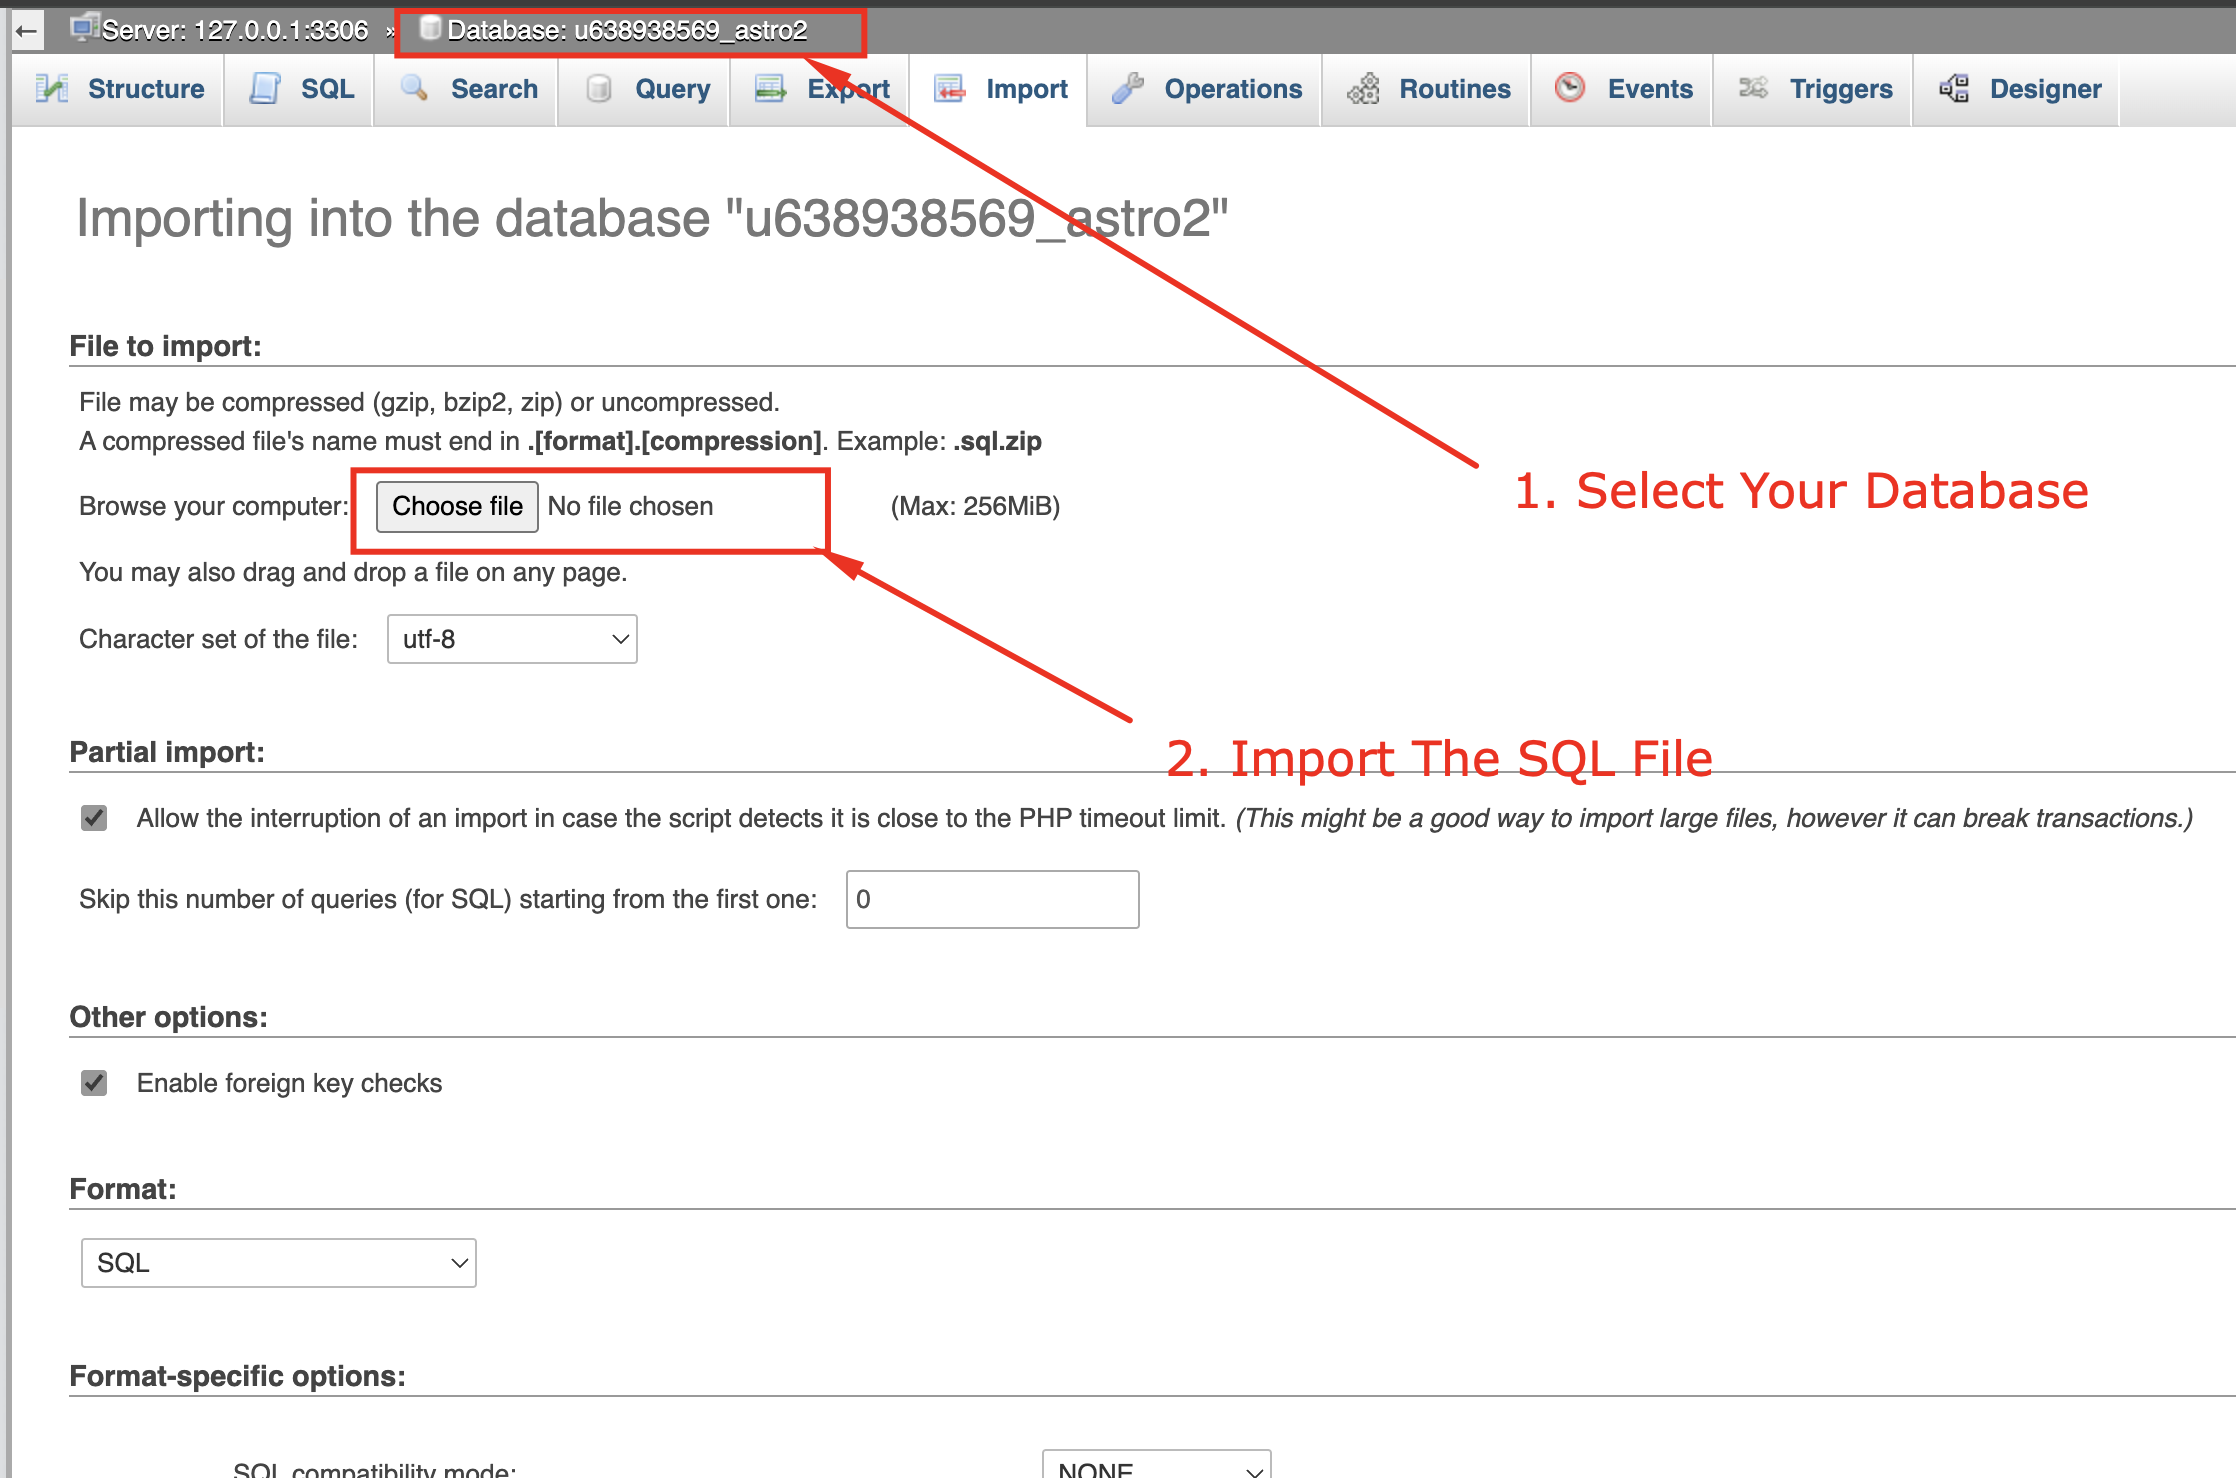
- Open PhpMyAdmin > Select Your Database > Import The SQL File

- You will find the SQL file inside the directory called Admin Panel

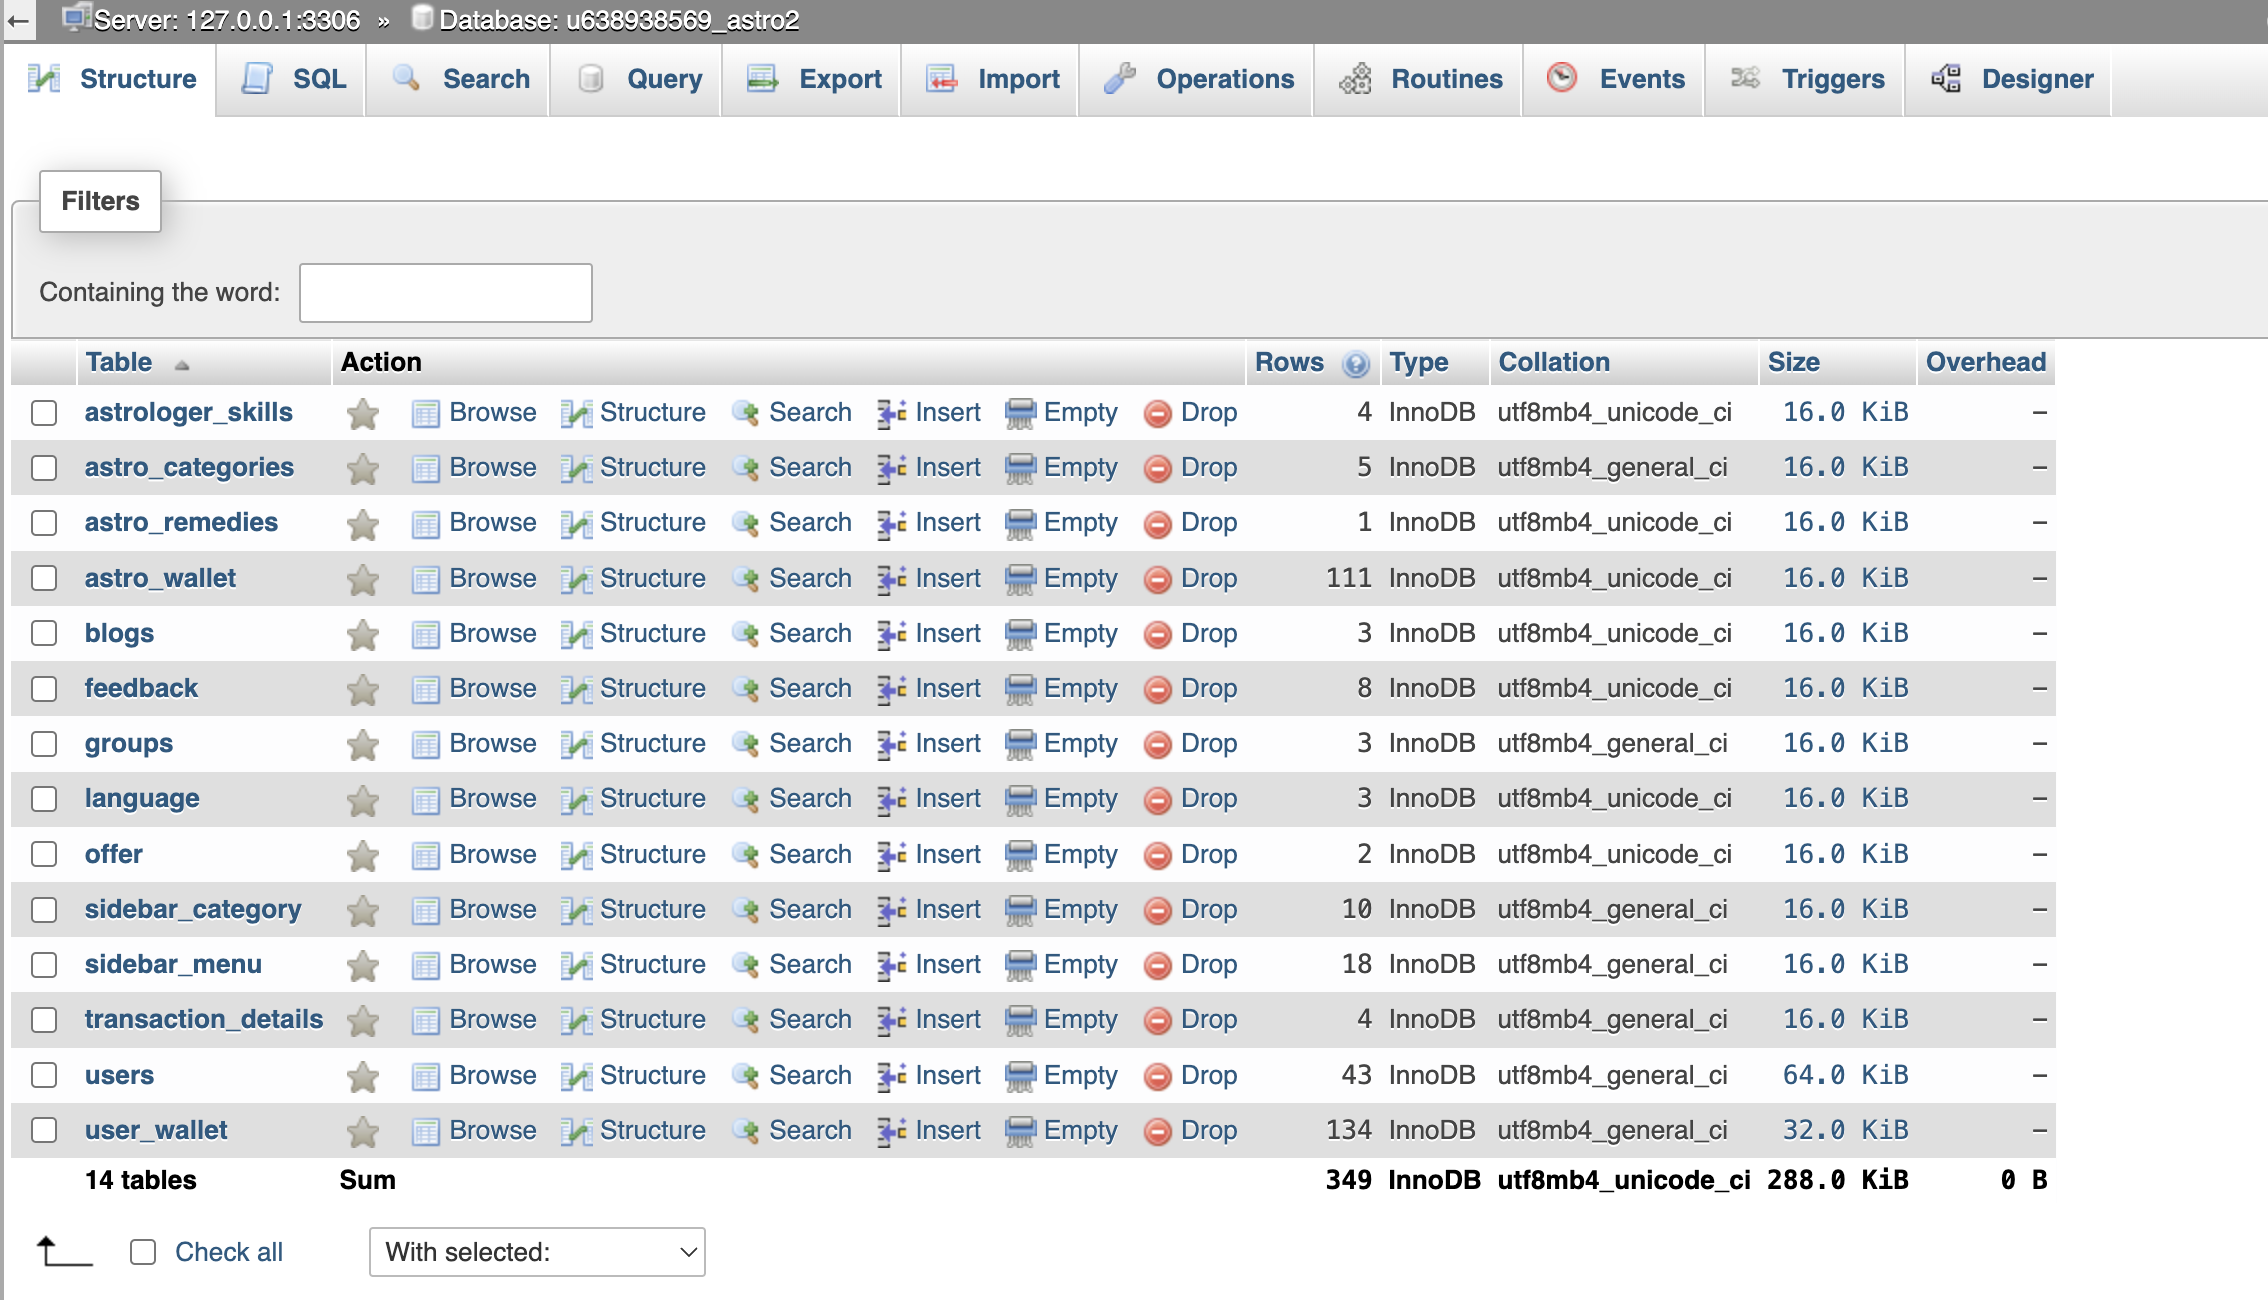
- Once the import is done, your database will look like this:

Step 4: Configure The Database with the admin panel (2 Pages)
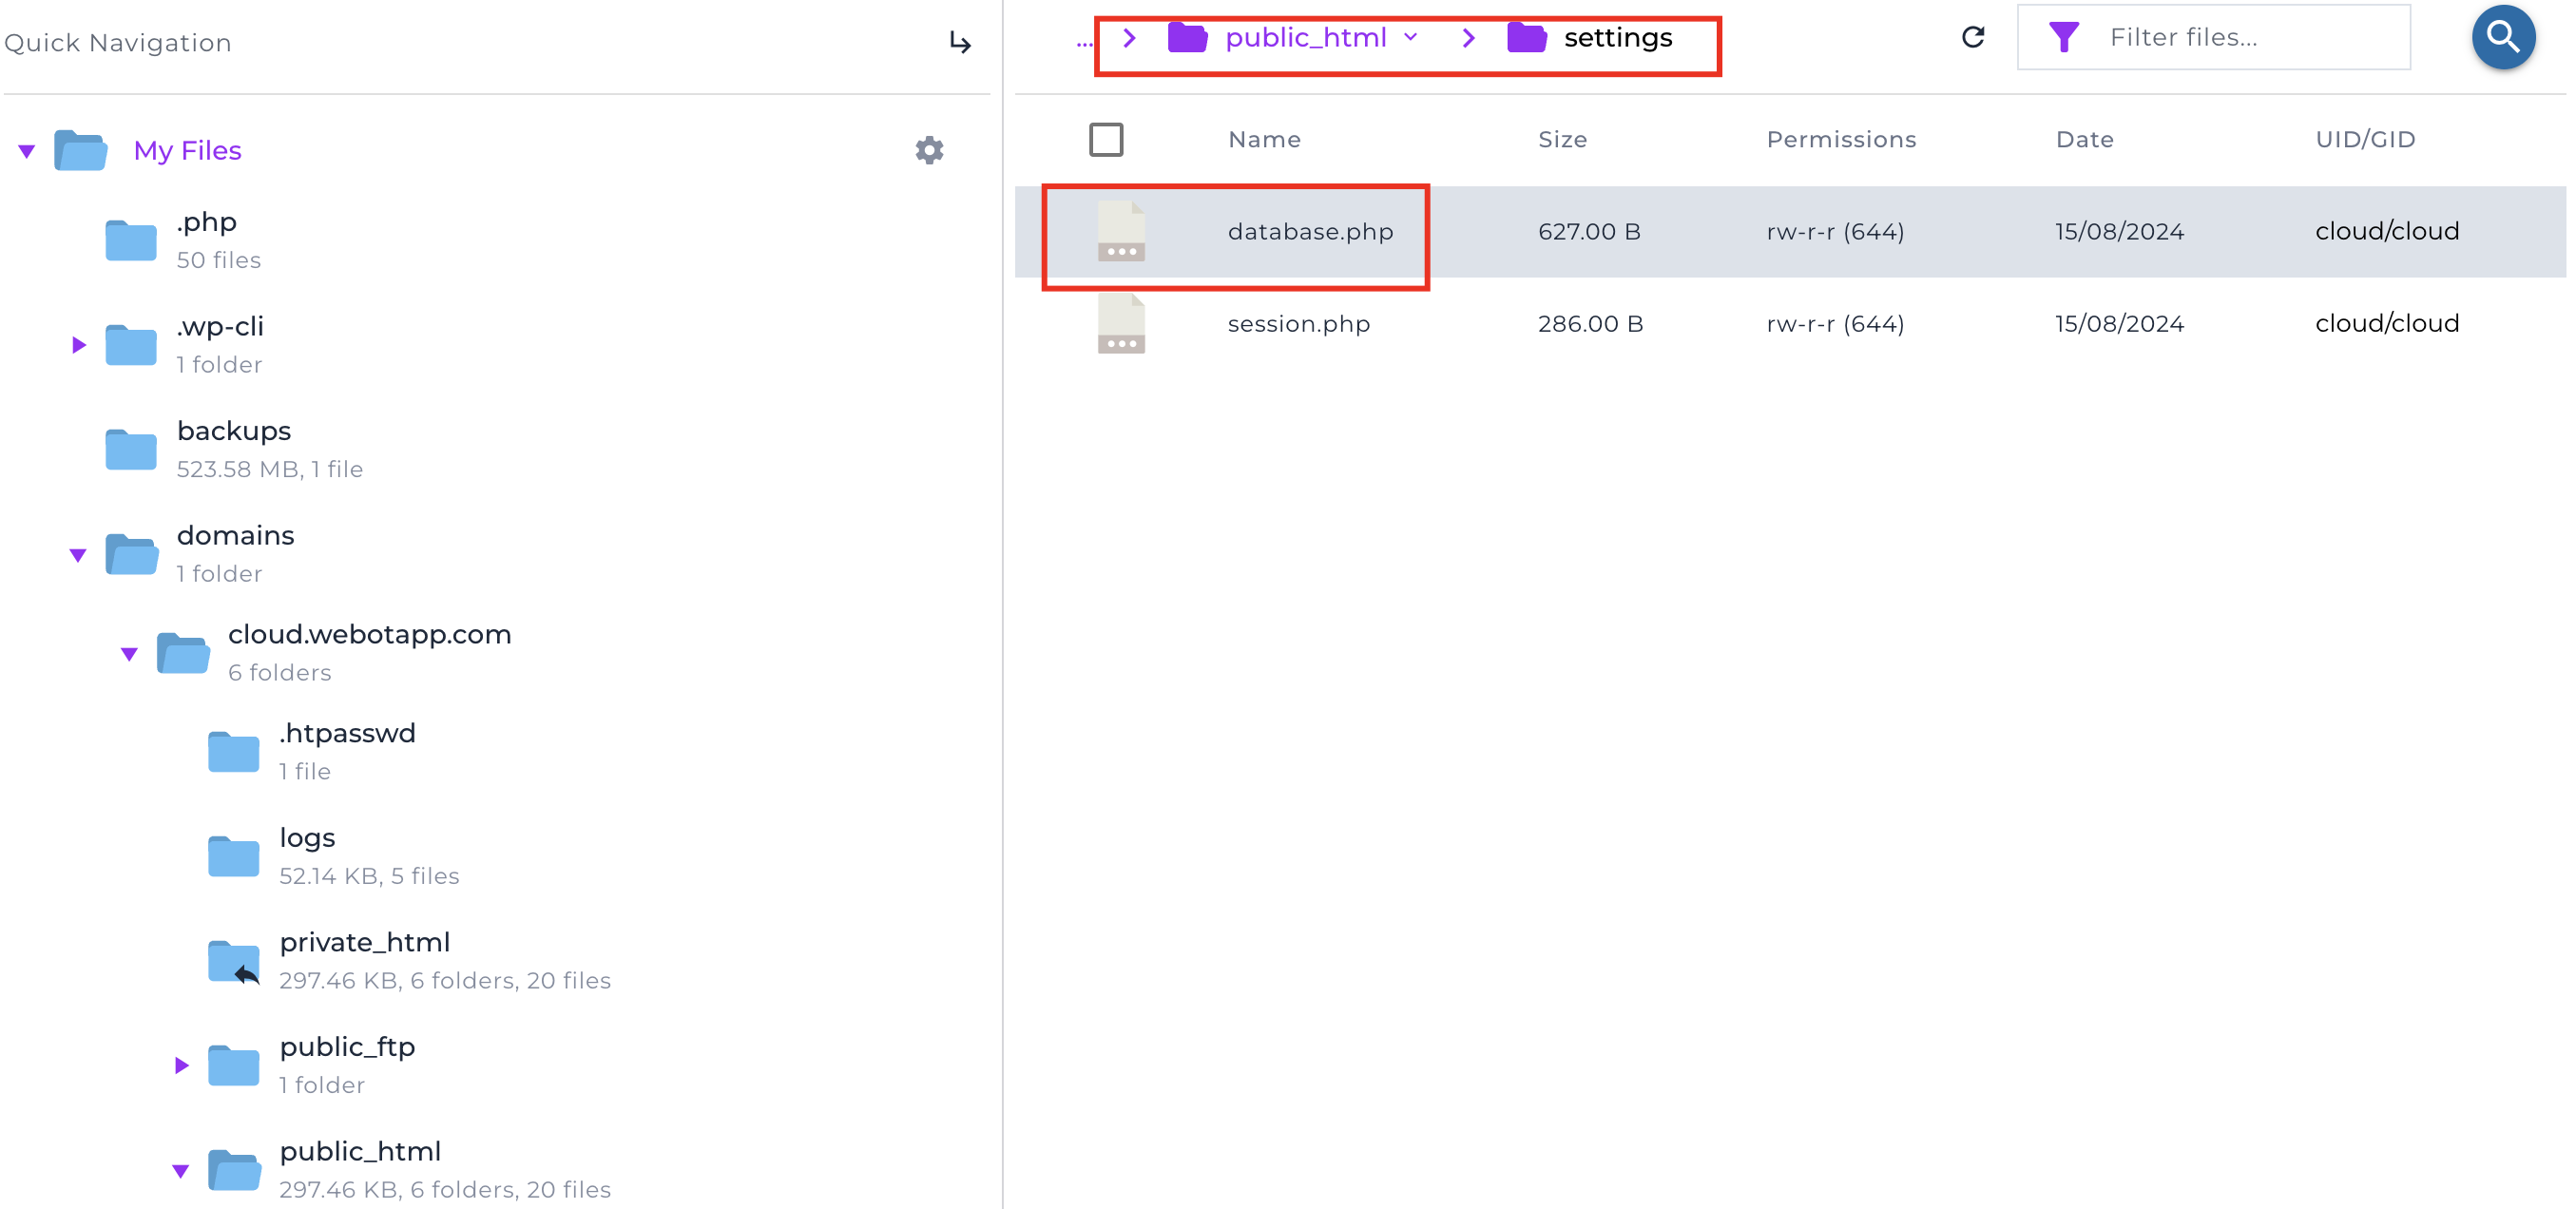
- Go to public_html > settings > database.php

- Update the credentials

- Now you need to link the API database. For that go to public_html > controllers > Flutter > api > db.php and update the credentials
Step 5: Configure Astro API
- This step is required for fetching daily horoscope, match making and kundli making.
- First visit https://vedicastroapi.com/ and sign up for a free account.
- Verify the account.
- Copy the API KEY

- Paste it inside public_html > controllers > Flutter > api > horoscope-api > horoscope-config.php

Step 6: Configure Ola Krutim Api For Latitude & Logitude Fetching
- This is a very important step that we will use at first for auto-complete place names and then to get the latitude and longitude of the particular place.
- We have used Ola Krutim Cloud instead of Google Maps because Ola Krutim gives 10 million hits for free (every month)

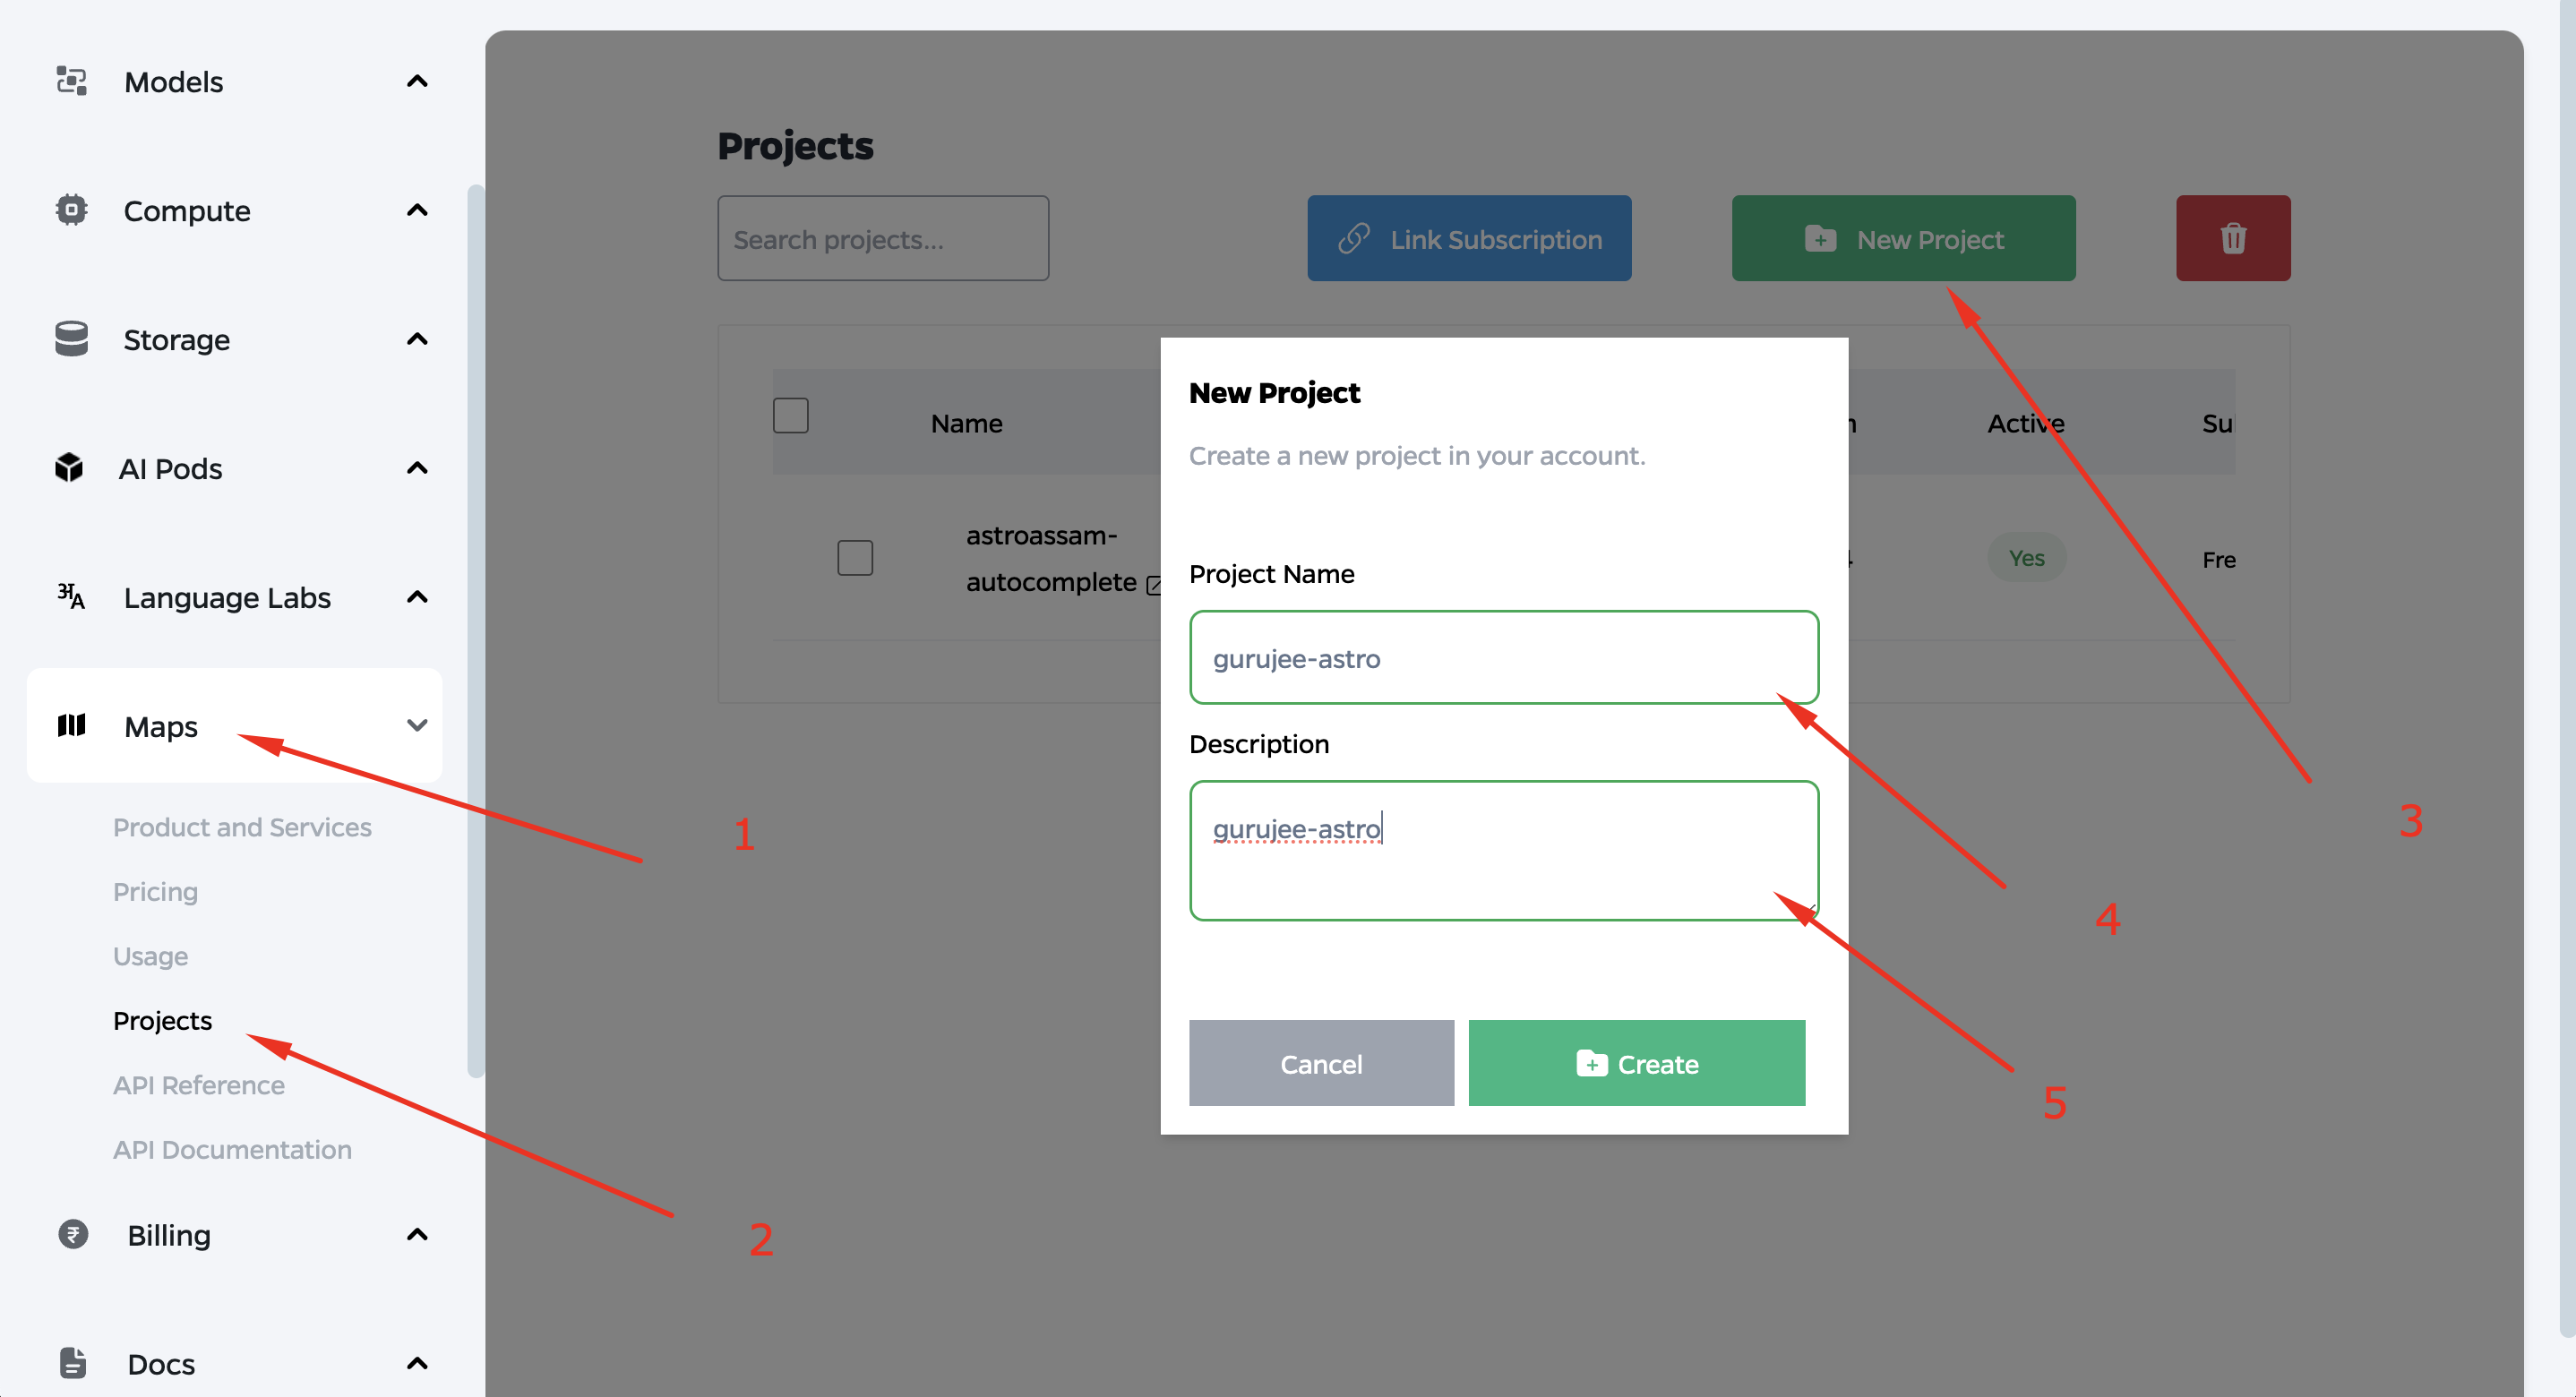
- Go to Maps > Projects > New Project > Give a project name and description > Hit on Create Button

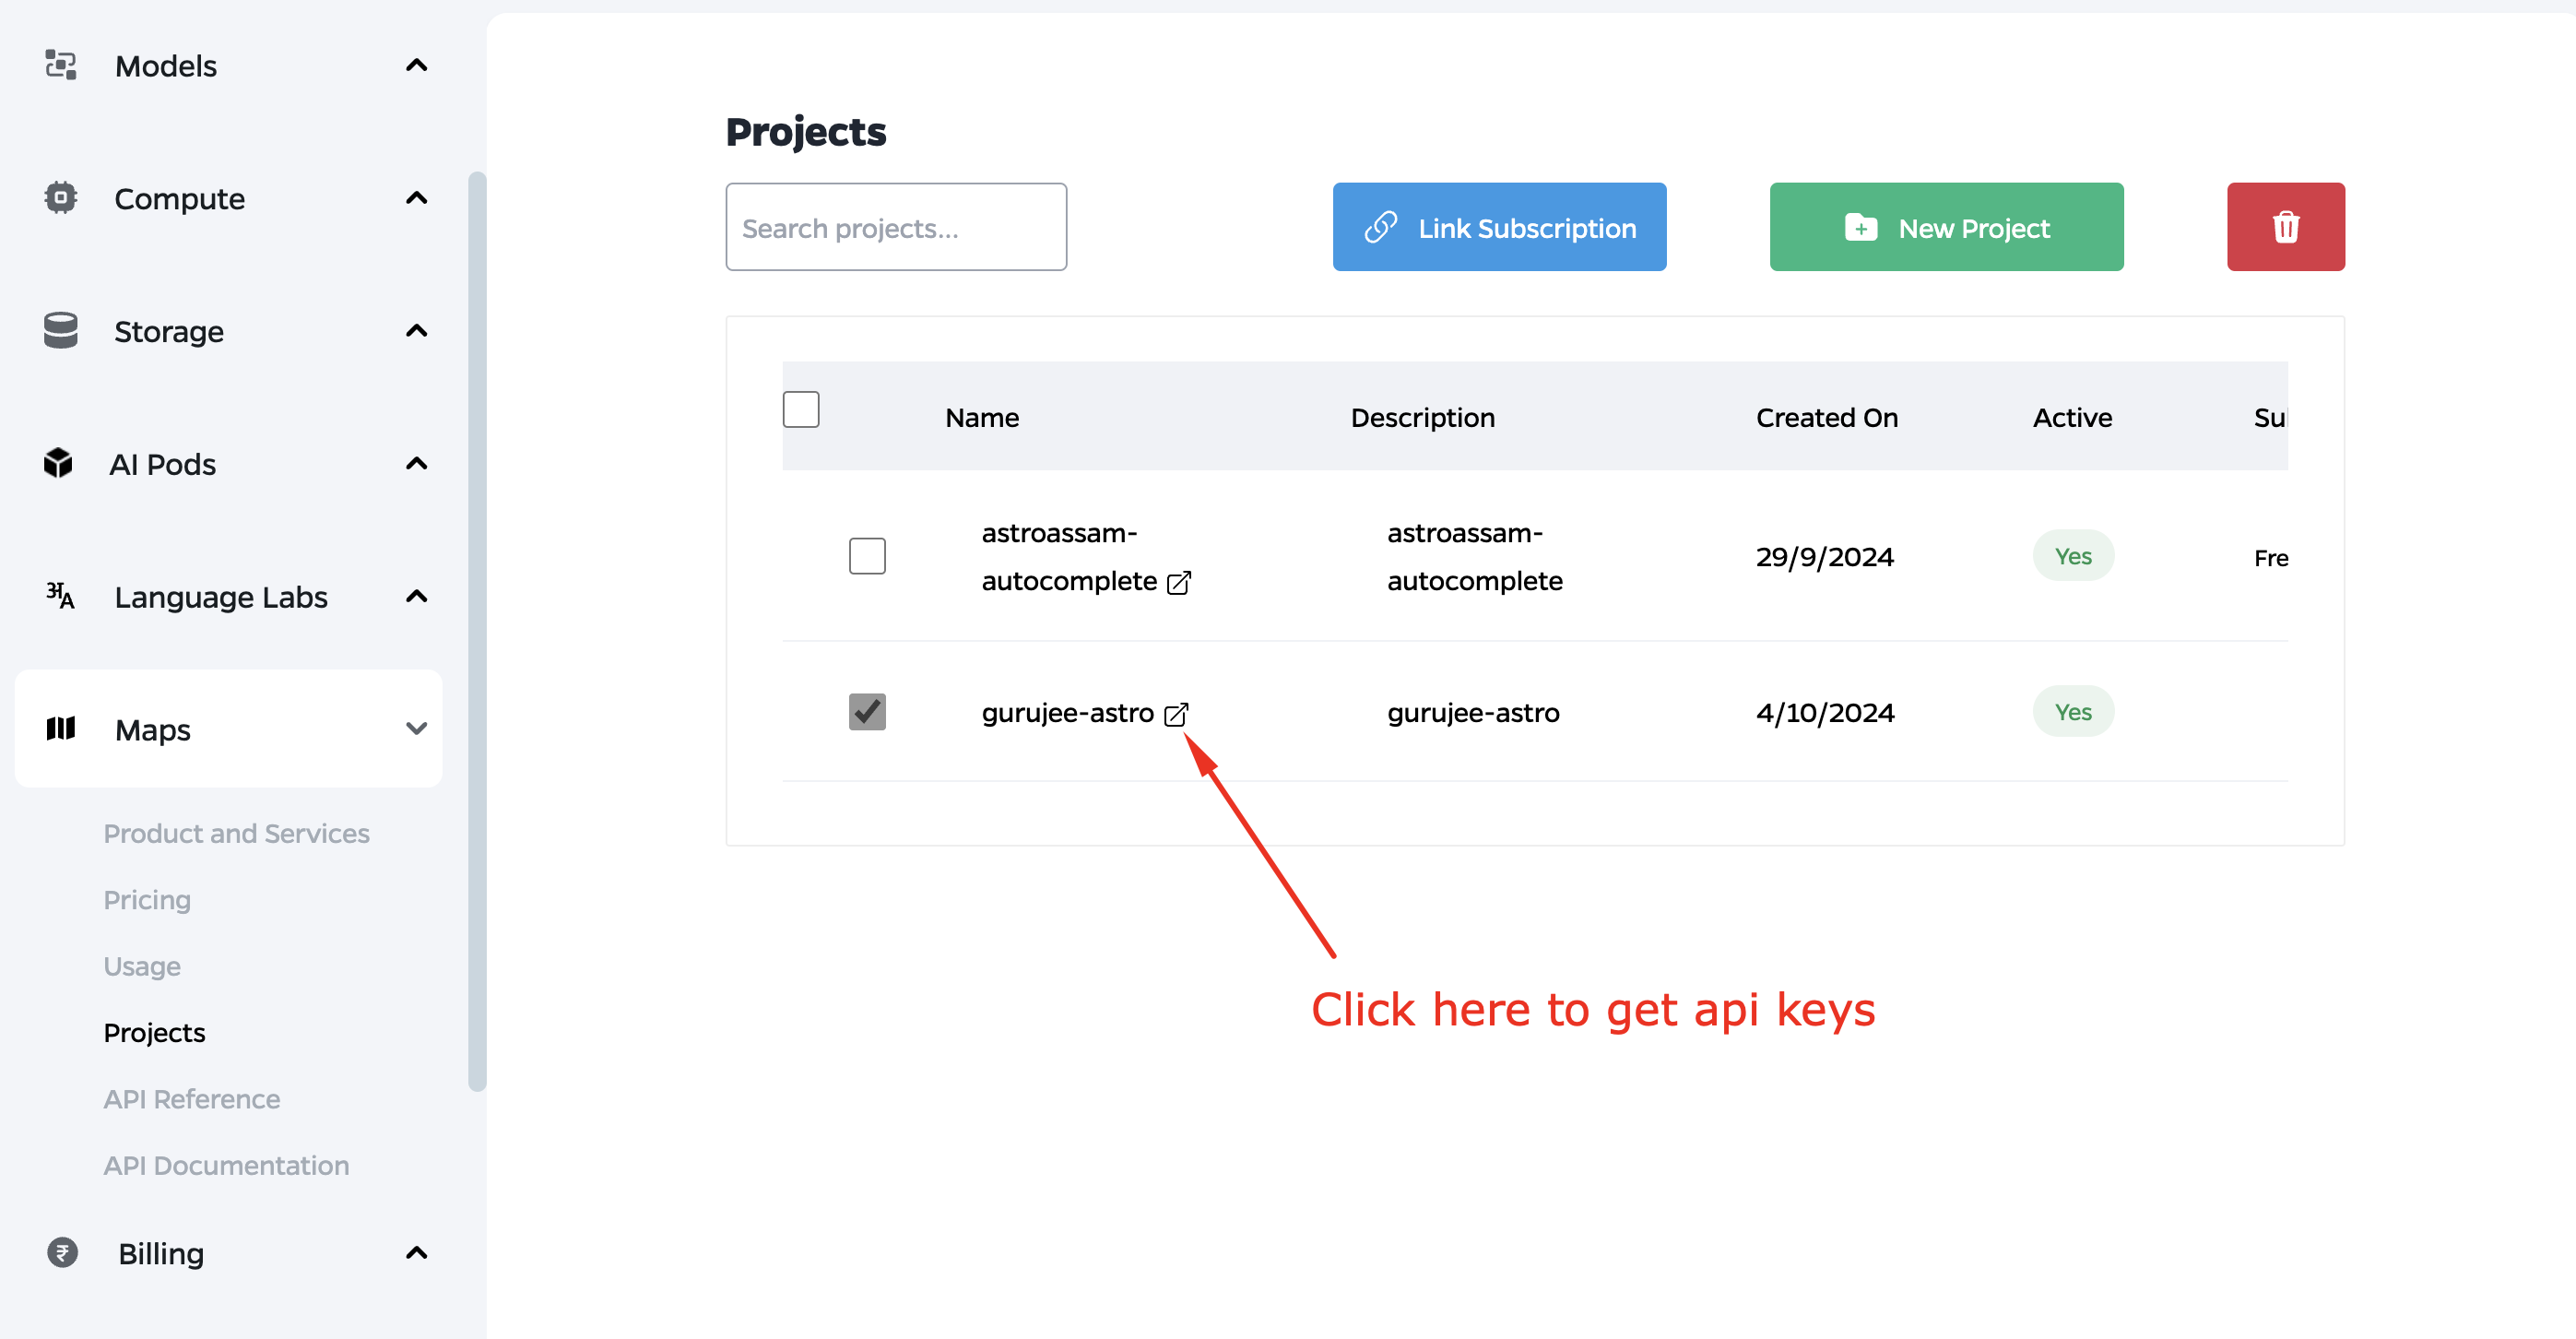
- Link the project by checking the project and then click the link subscription

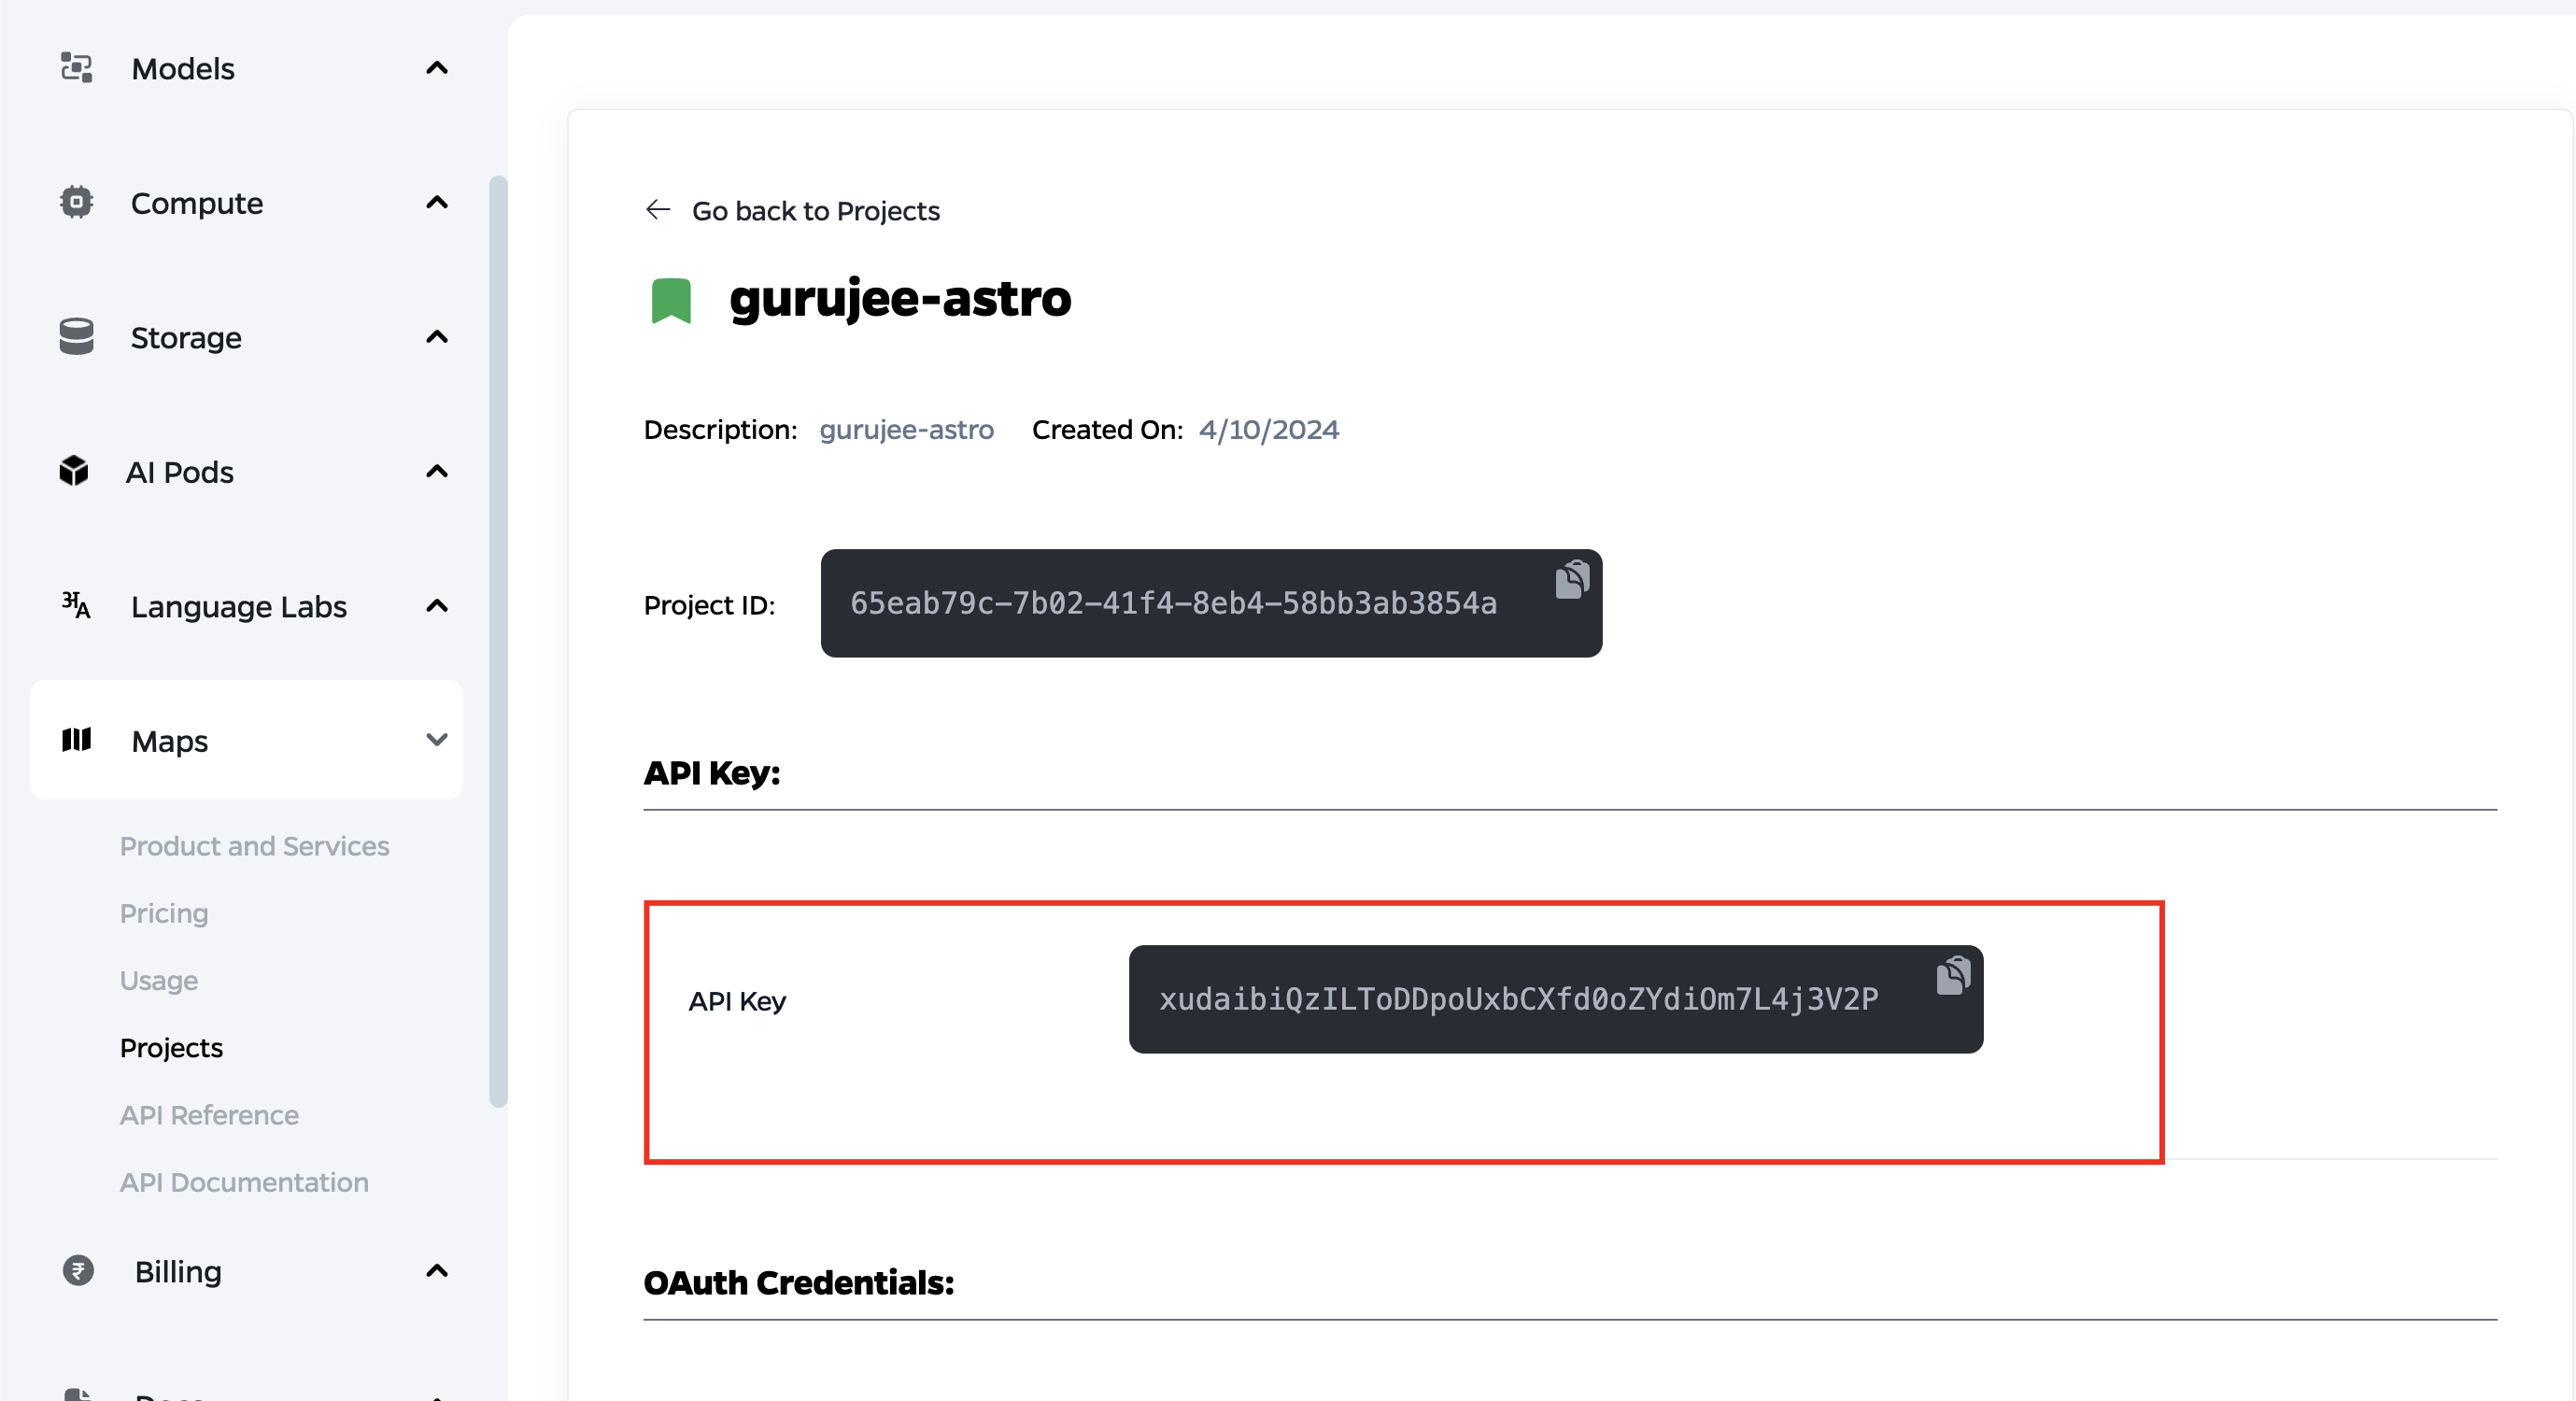
- Click to get the API keys

- Copy the API key

- Now go to public_html > controllers > Flutter > api > ola-krutim

Step 7: Configure Push Notification From Admin Panel
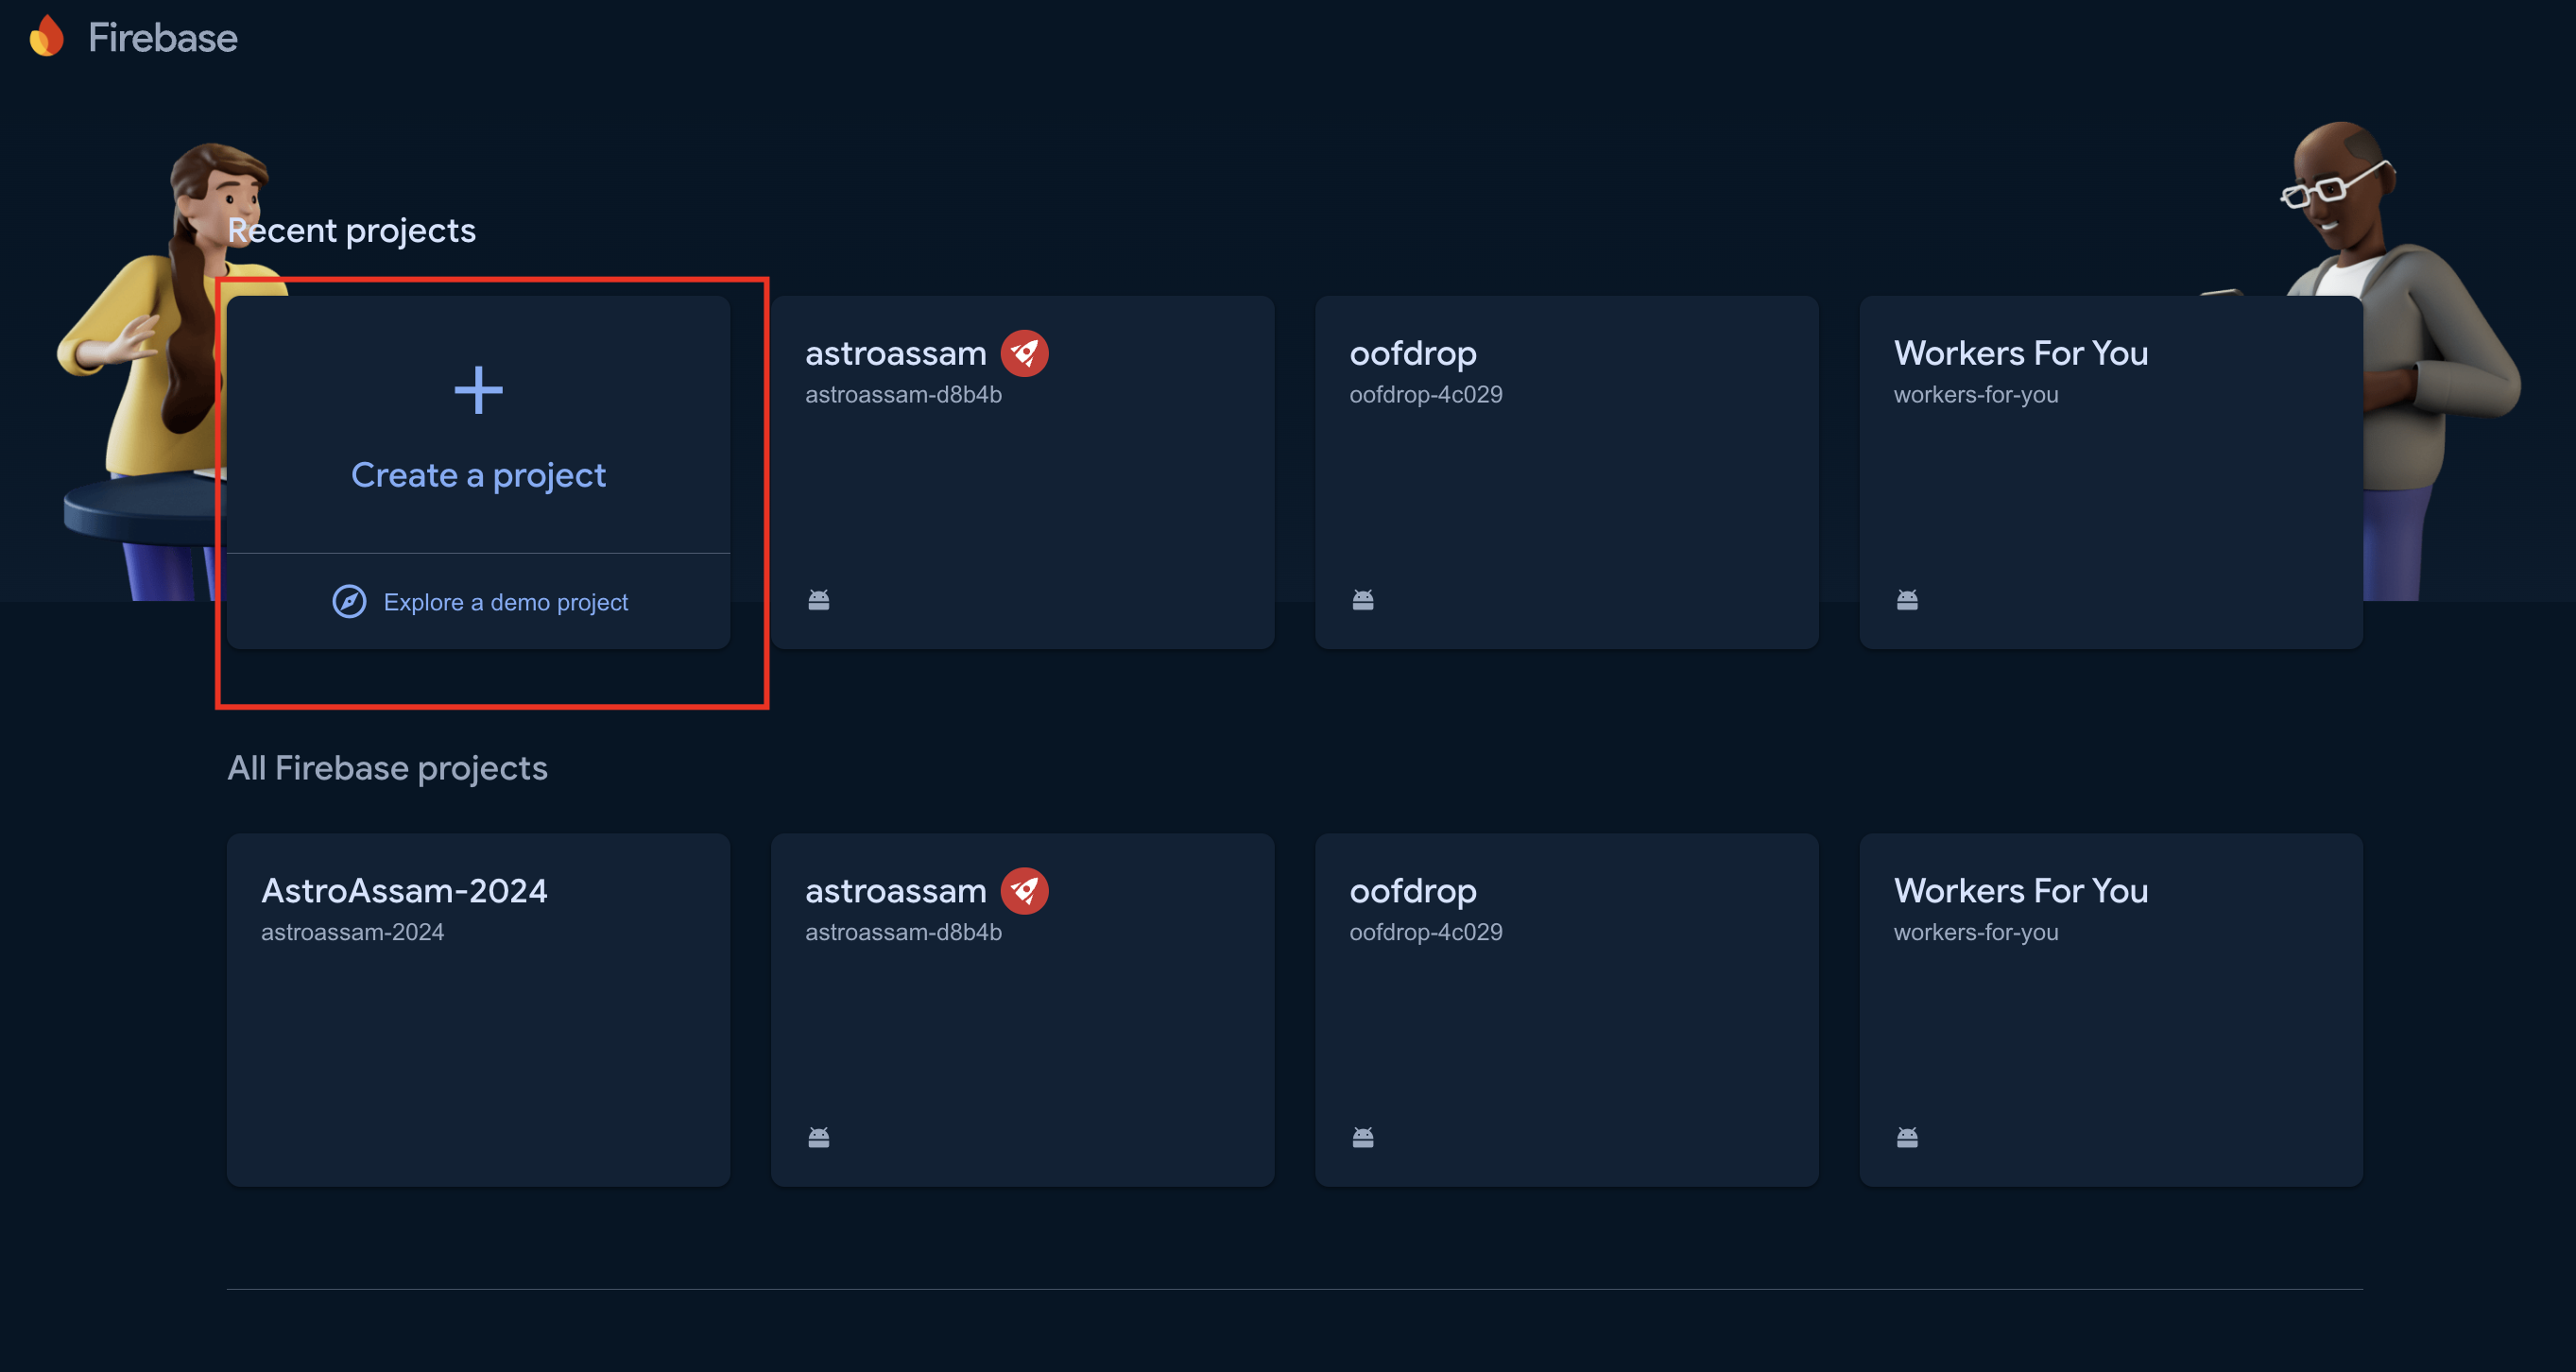
- Go to Firebase Console
- Create a Firebase Project

- Fill up the wizard (Check the screenshots step by step)


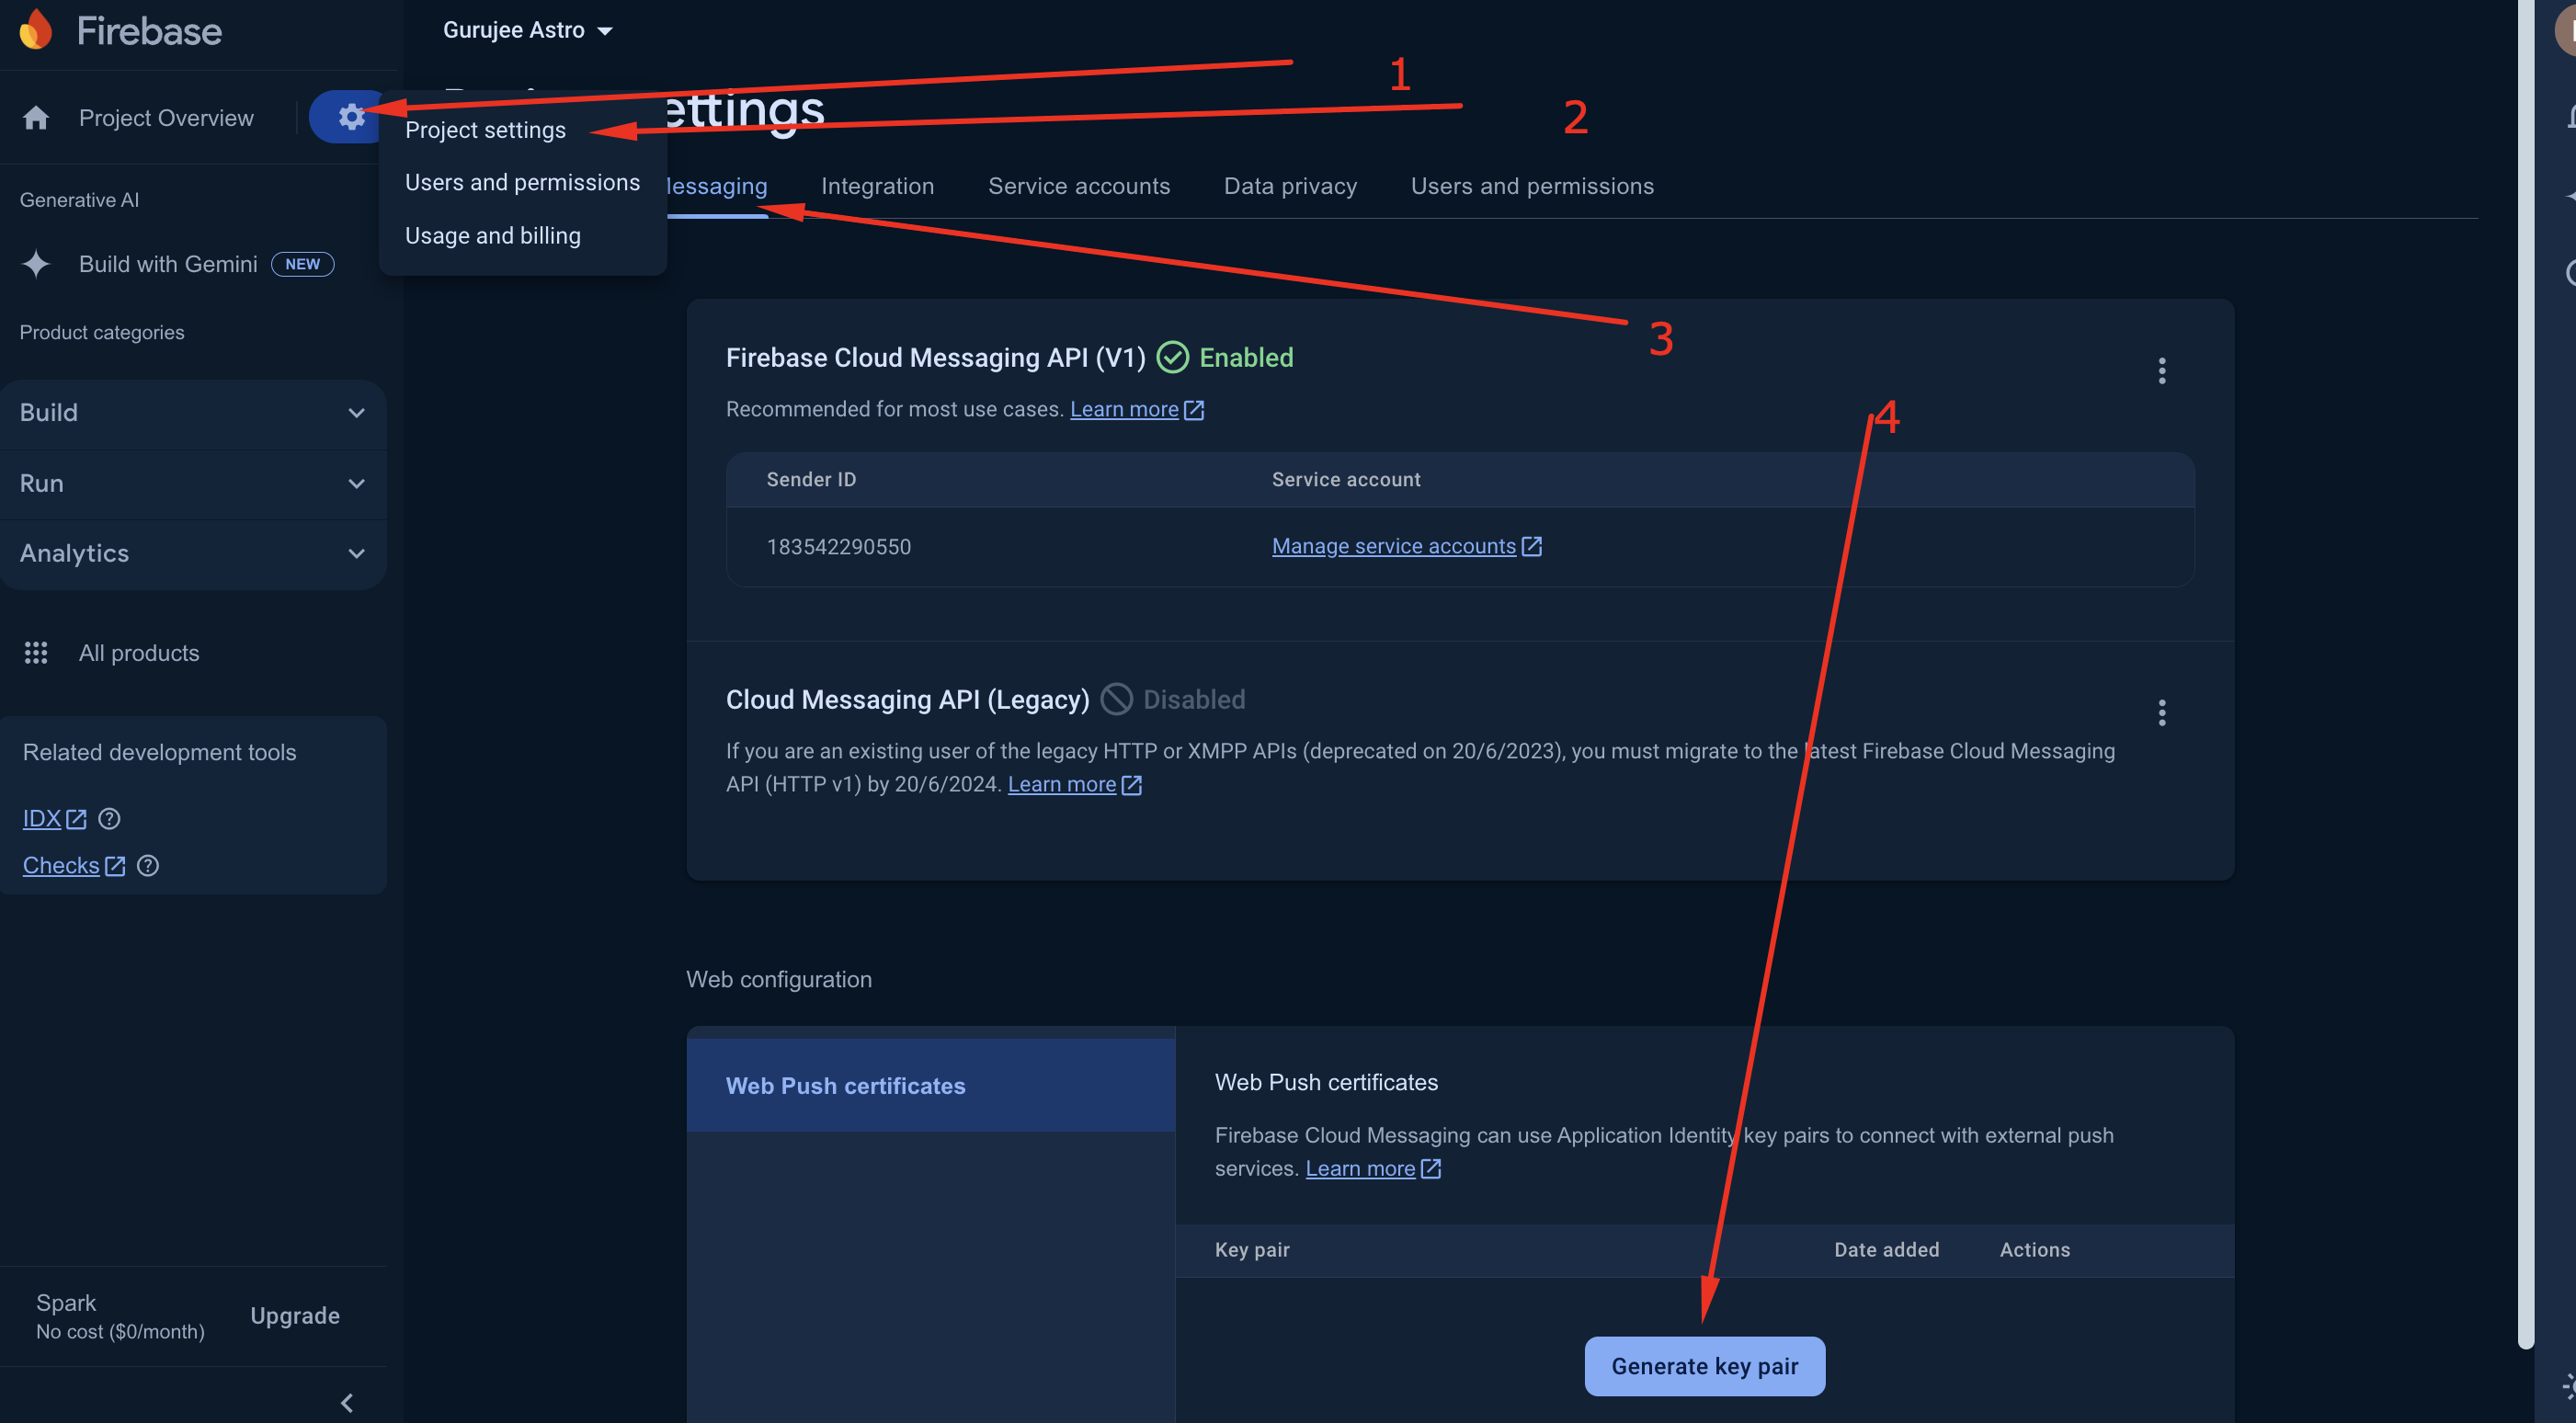
- Click on Settings > Project Settings > Cloud Messaging > Generate Key Pair

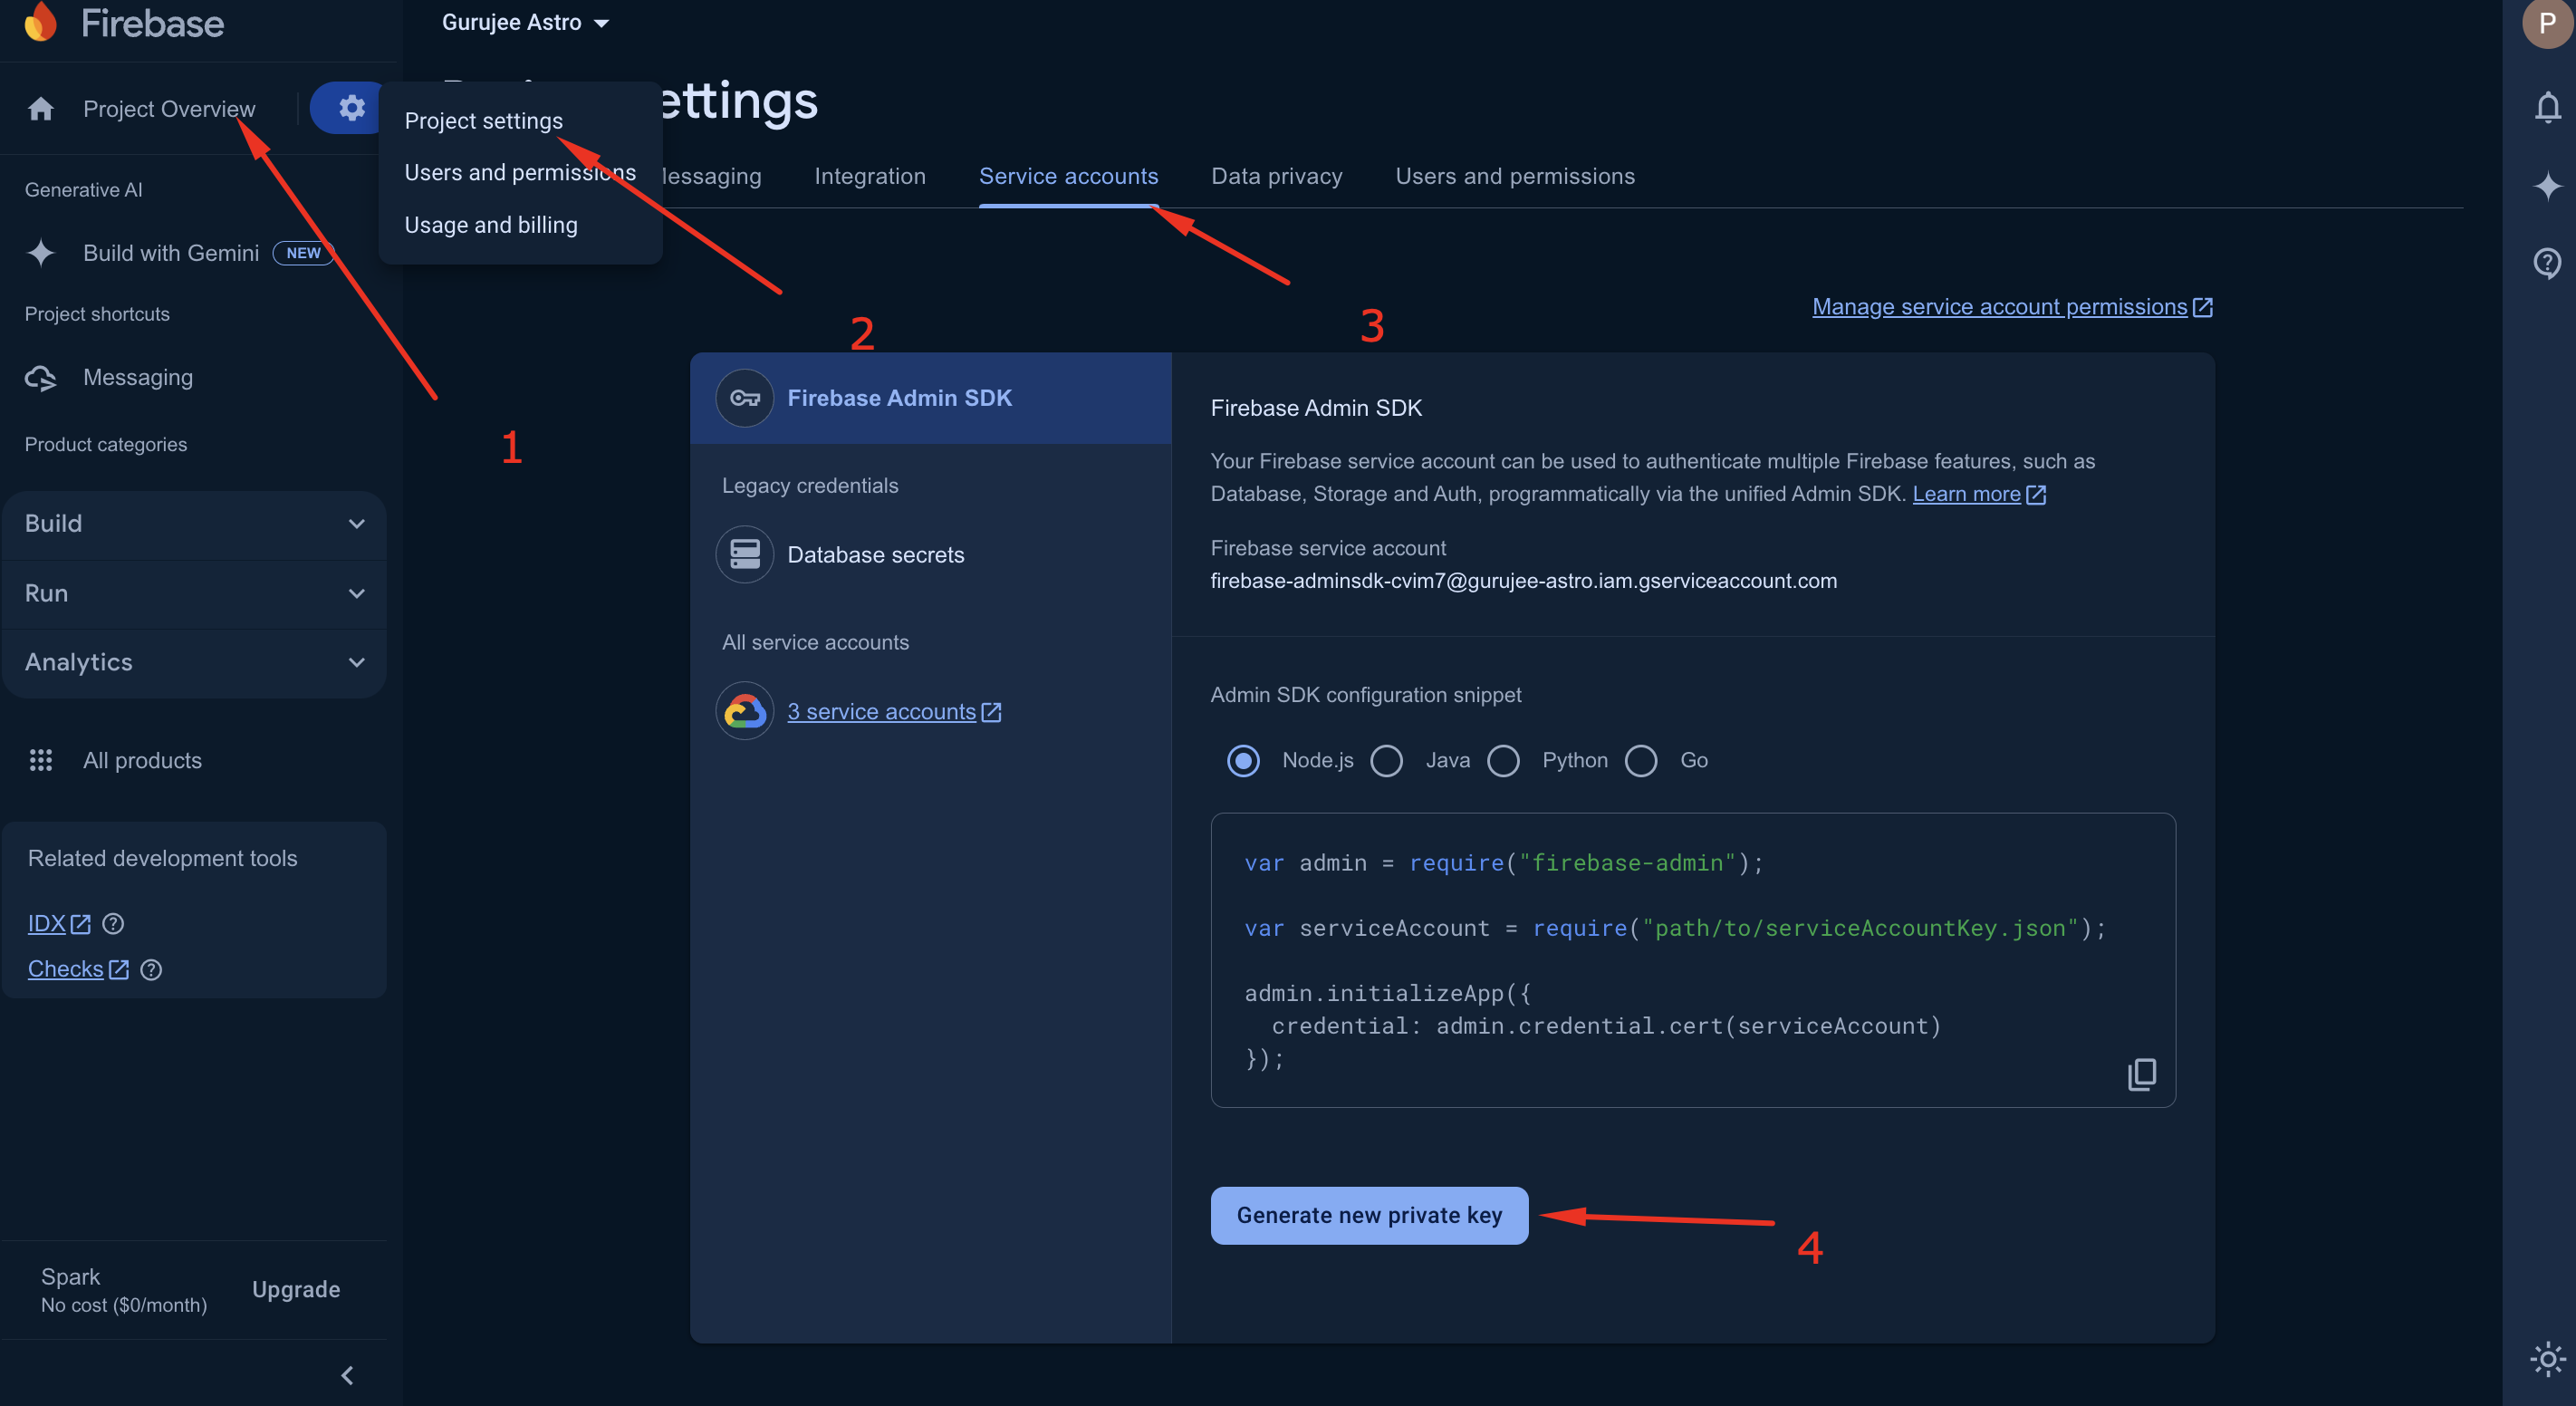
- Next, Click on Settings > Project Settings > Service Accounts > Generate New Private Key

- Generate and save a new private key.
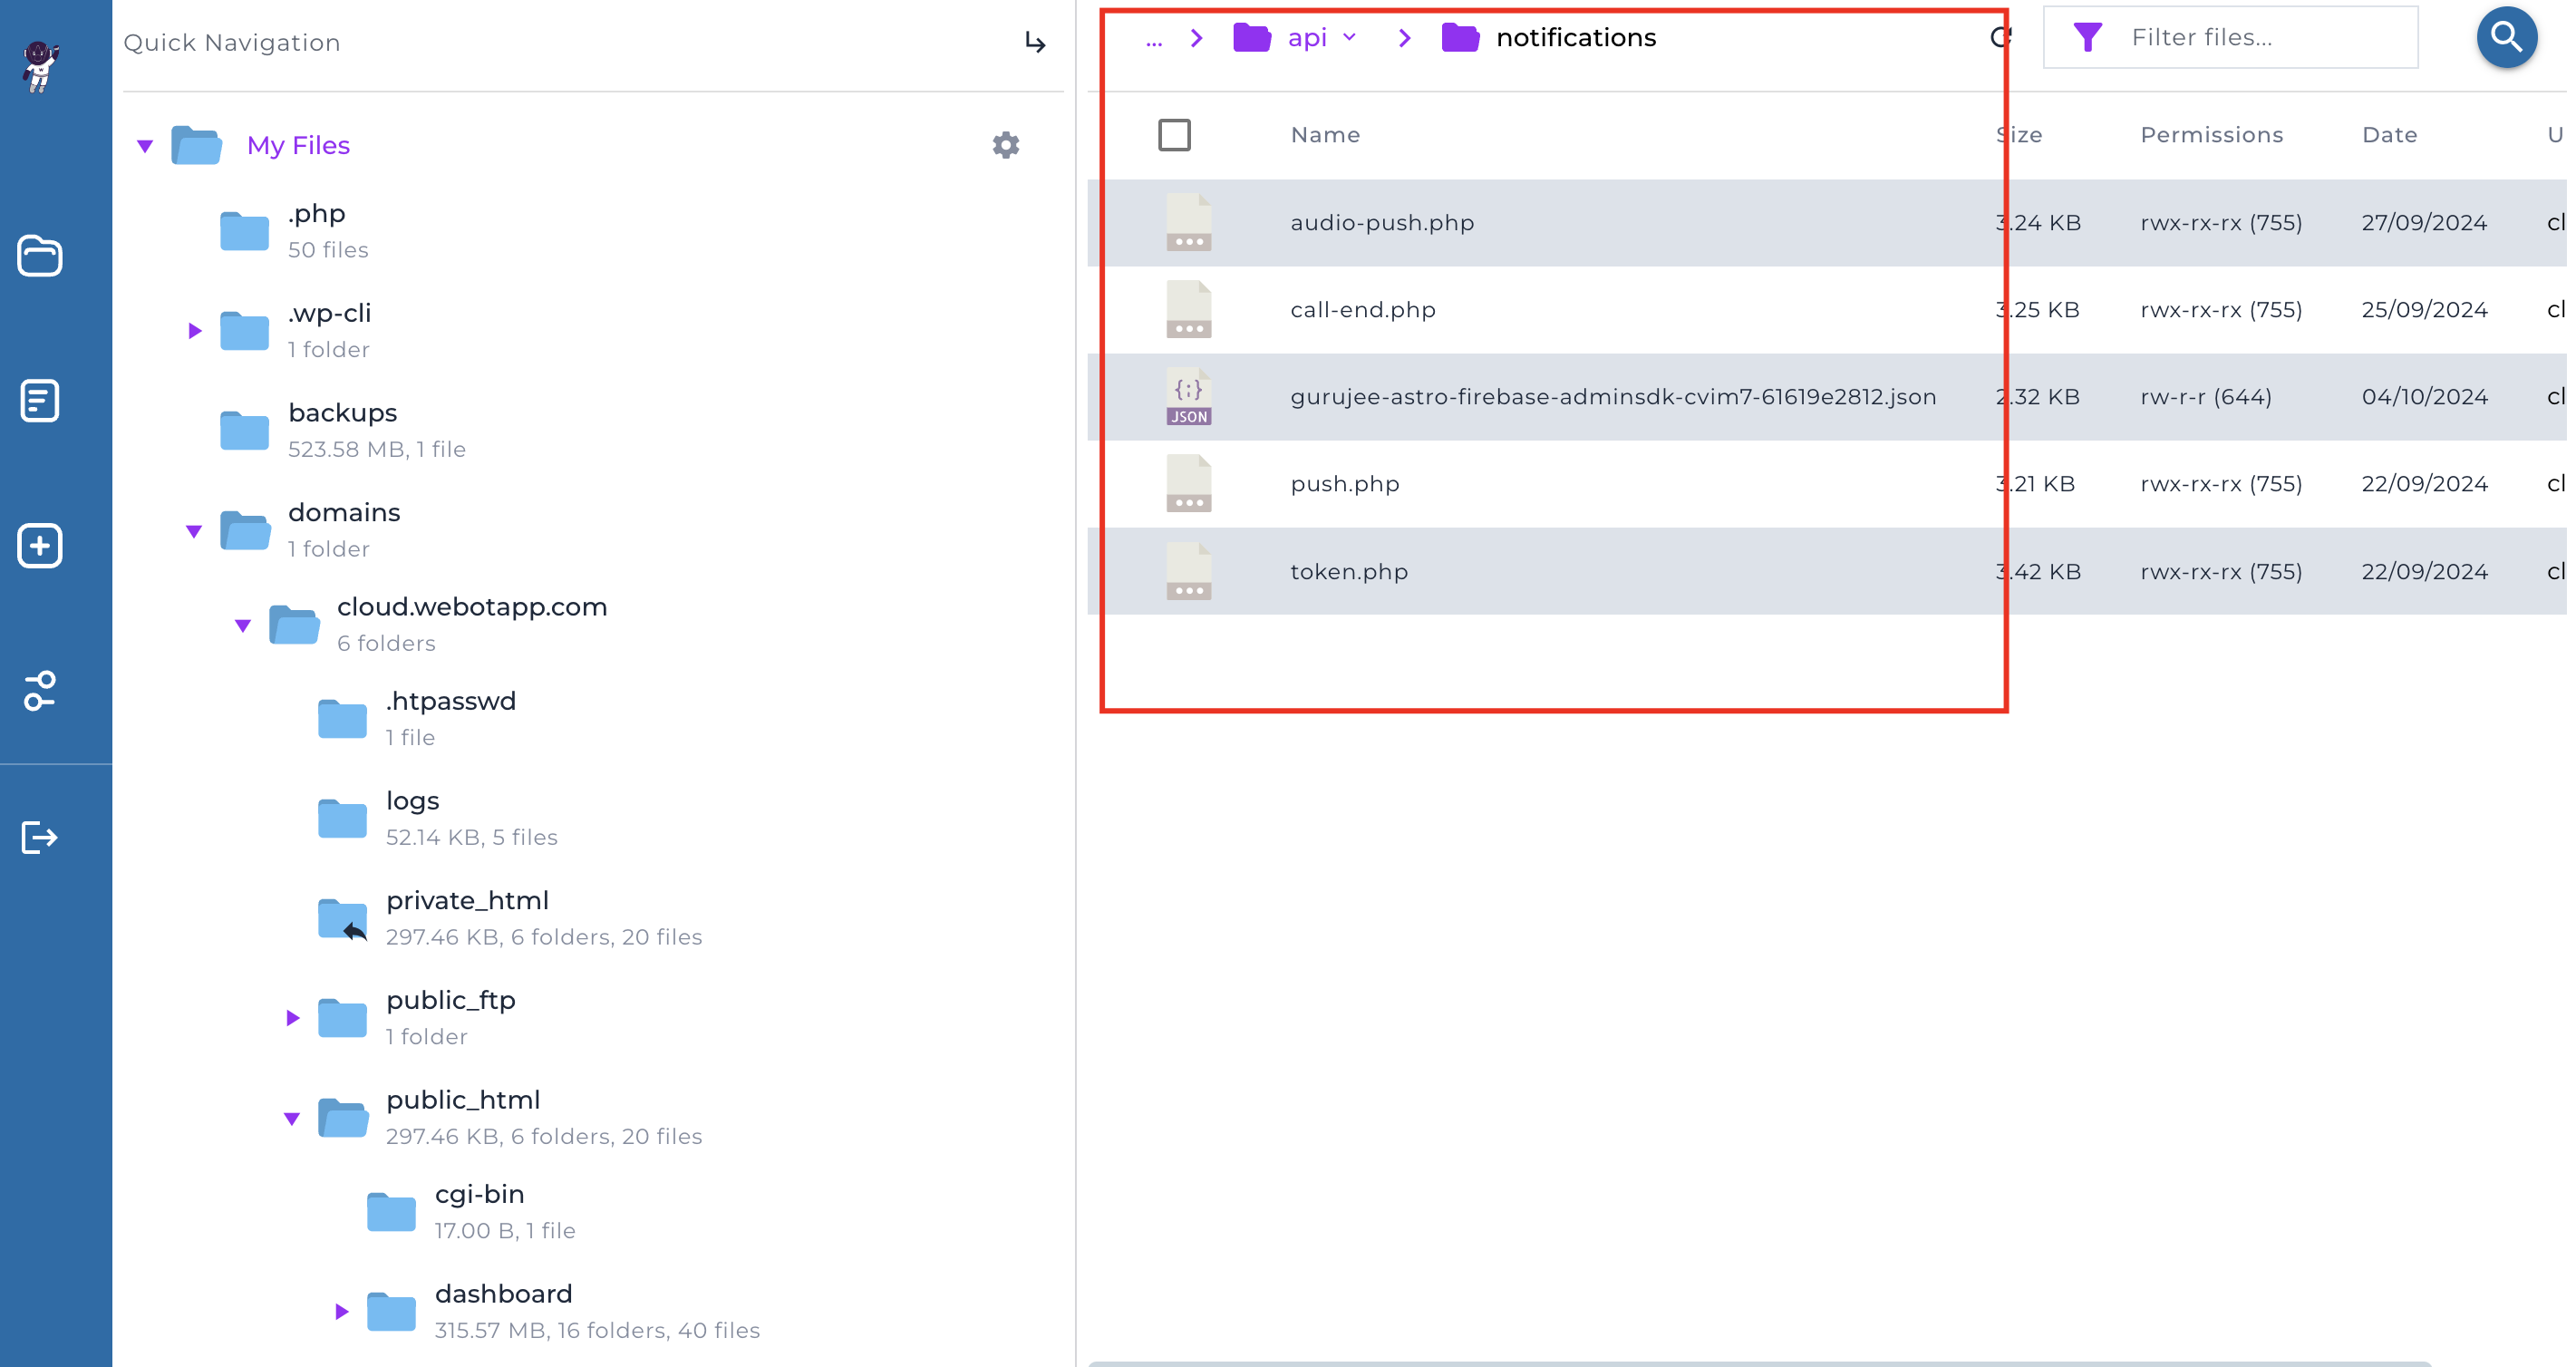
- Upload the private key at public_html > controllers > Flutter > api > notifications

- Now you have successfully completed your admin panel setup.
- The next step is to set up the flutter app.
Step 8: Import Flutter Code To Android Studio
- Open the downloaded zip

- Open Flutter Codes and you will find the below screen

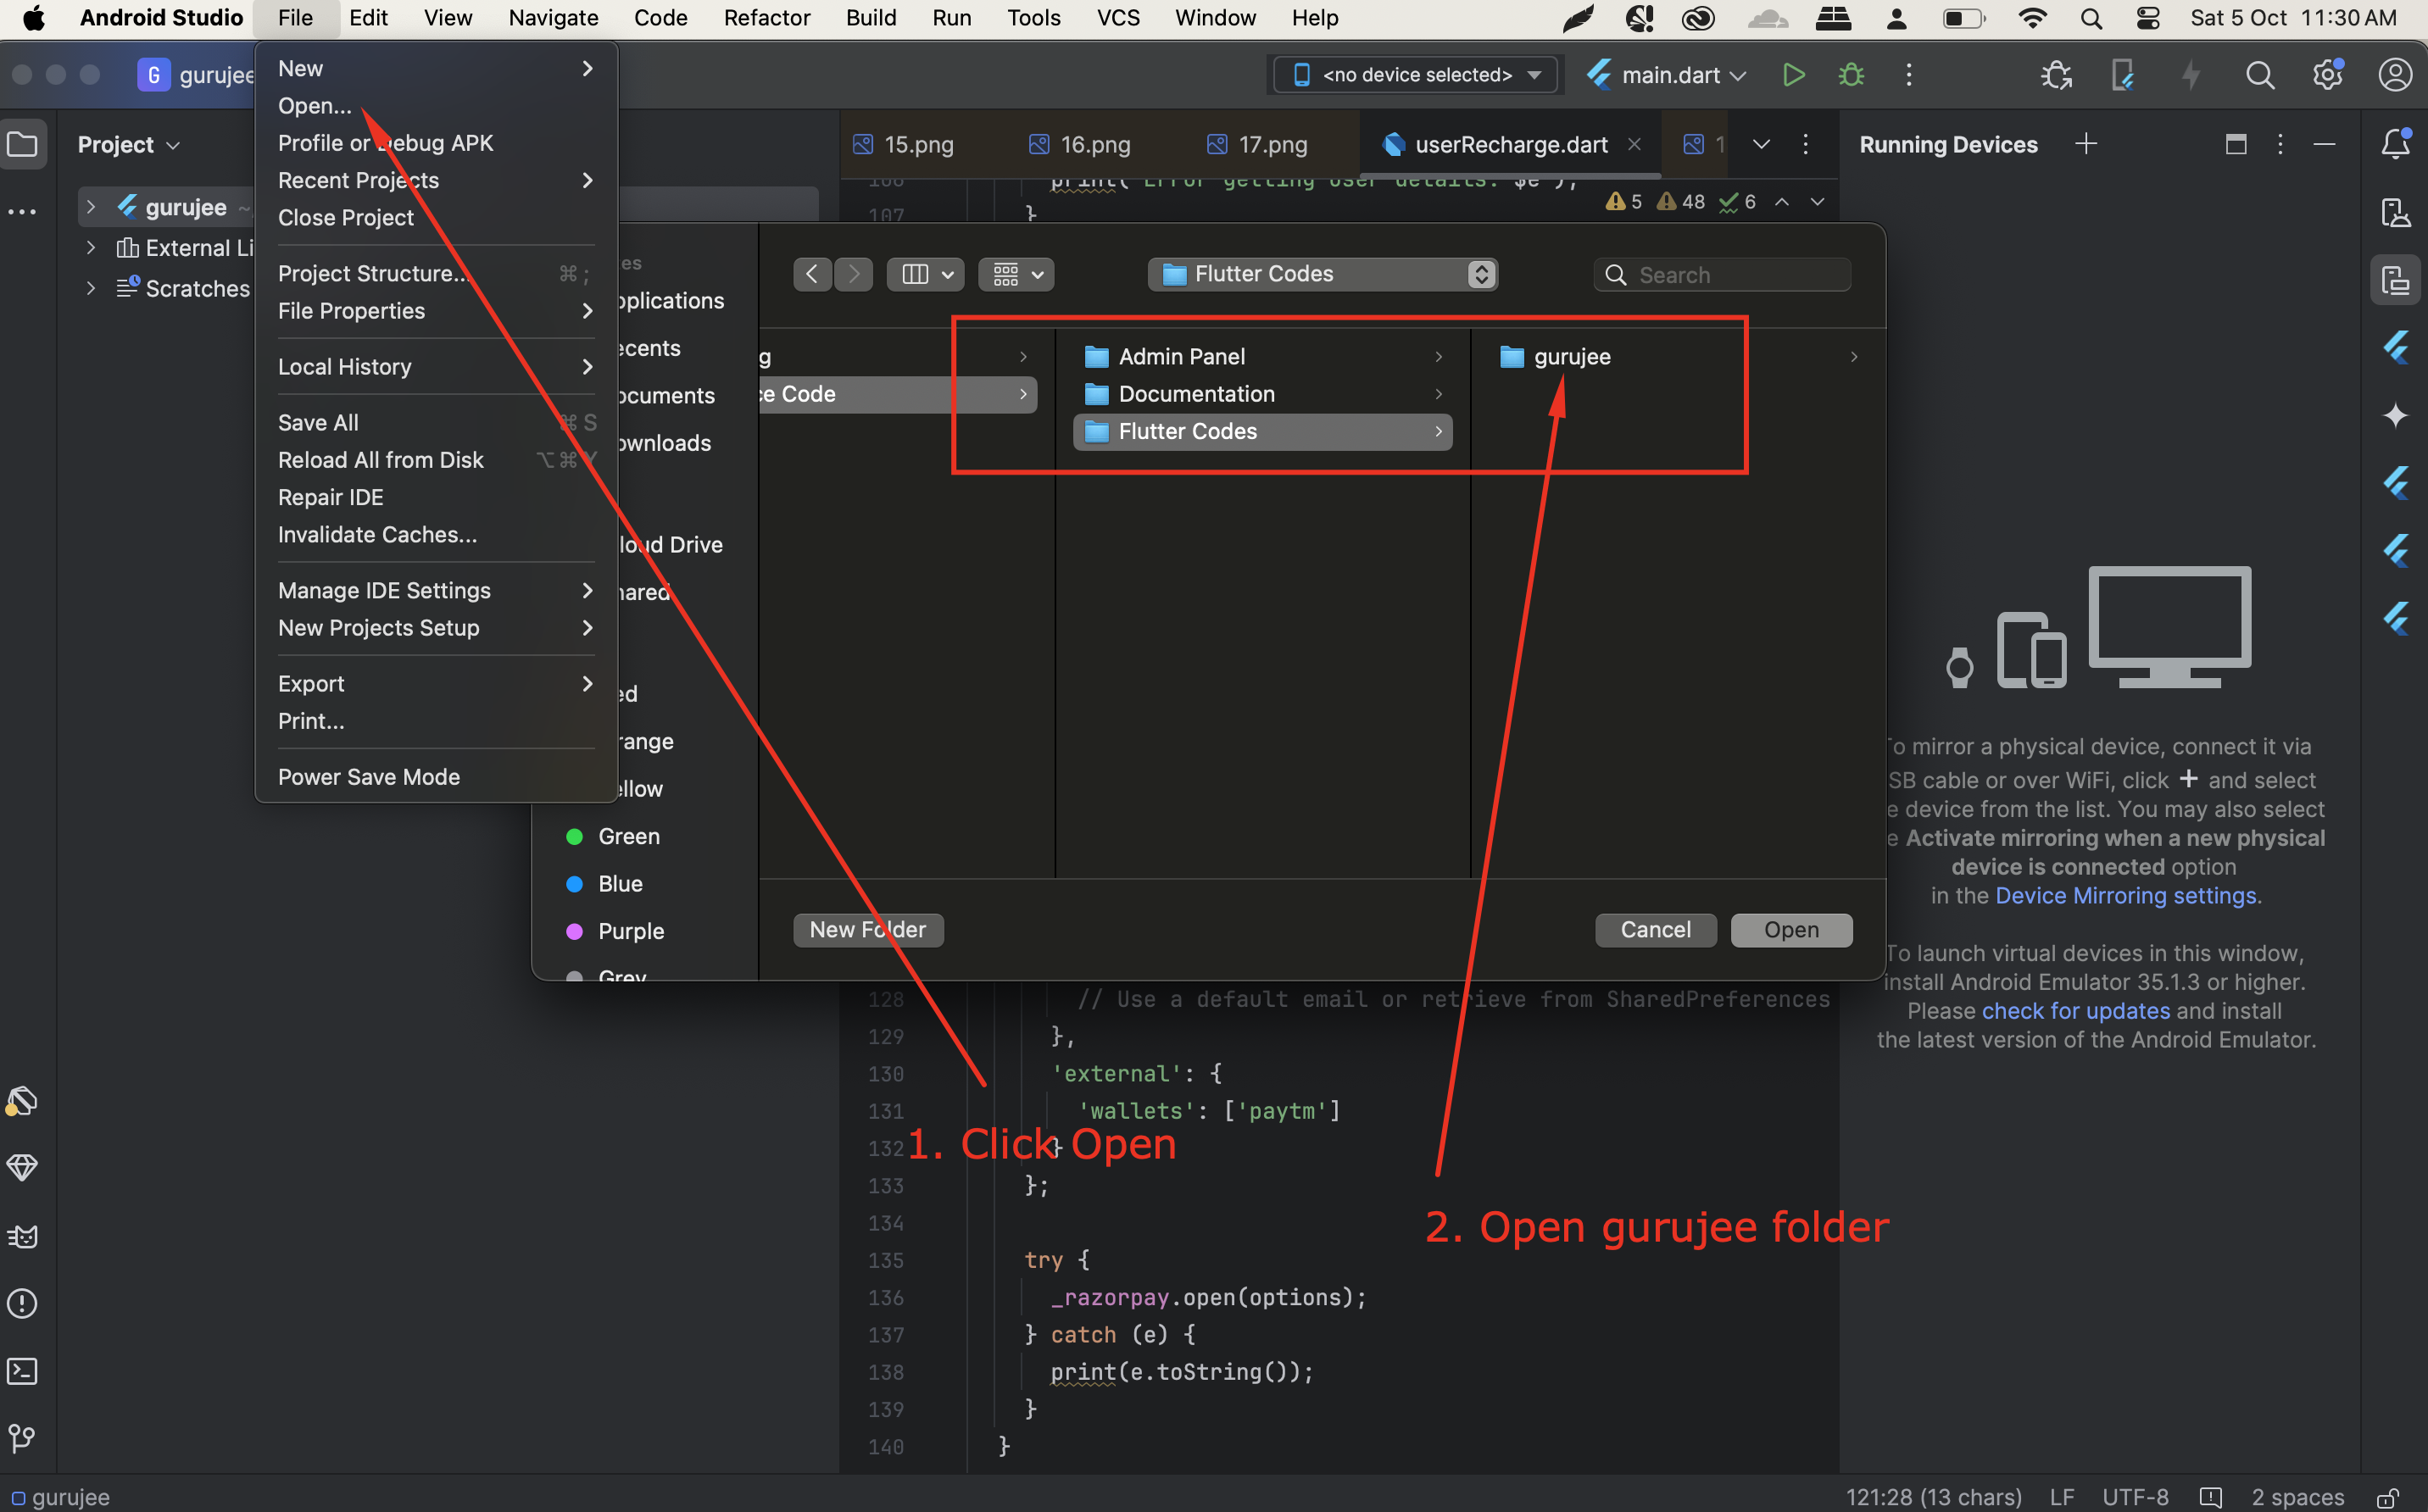
- Open Android Studio, Import the entire folder Called Gurujee

Step 9: Change Project Names
- Go to pubspec.yaml and change the project name

- Change import paths from all files inside lib directory

- Screenshot of the paths that you need to change

- Now, build the Flutter app, as shown in the screenshot

- If the build does not work, then open the terminal, run flutter pub get, and run the app in the emulator again.
- You will see the app running smooth on the emulator.
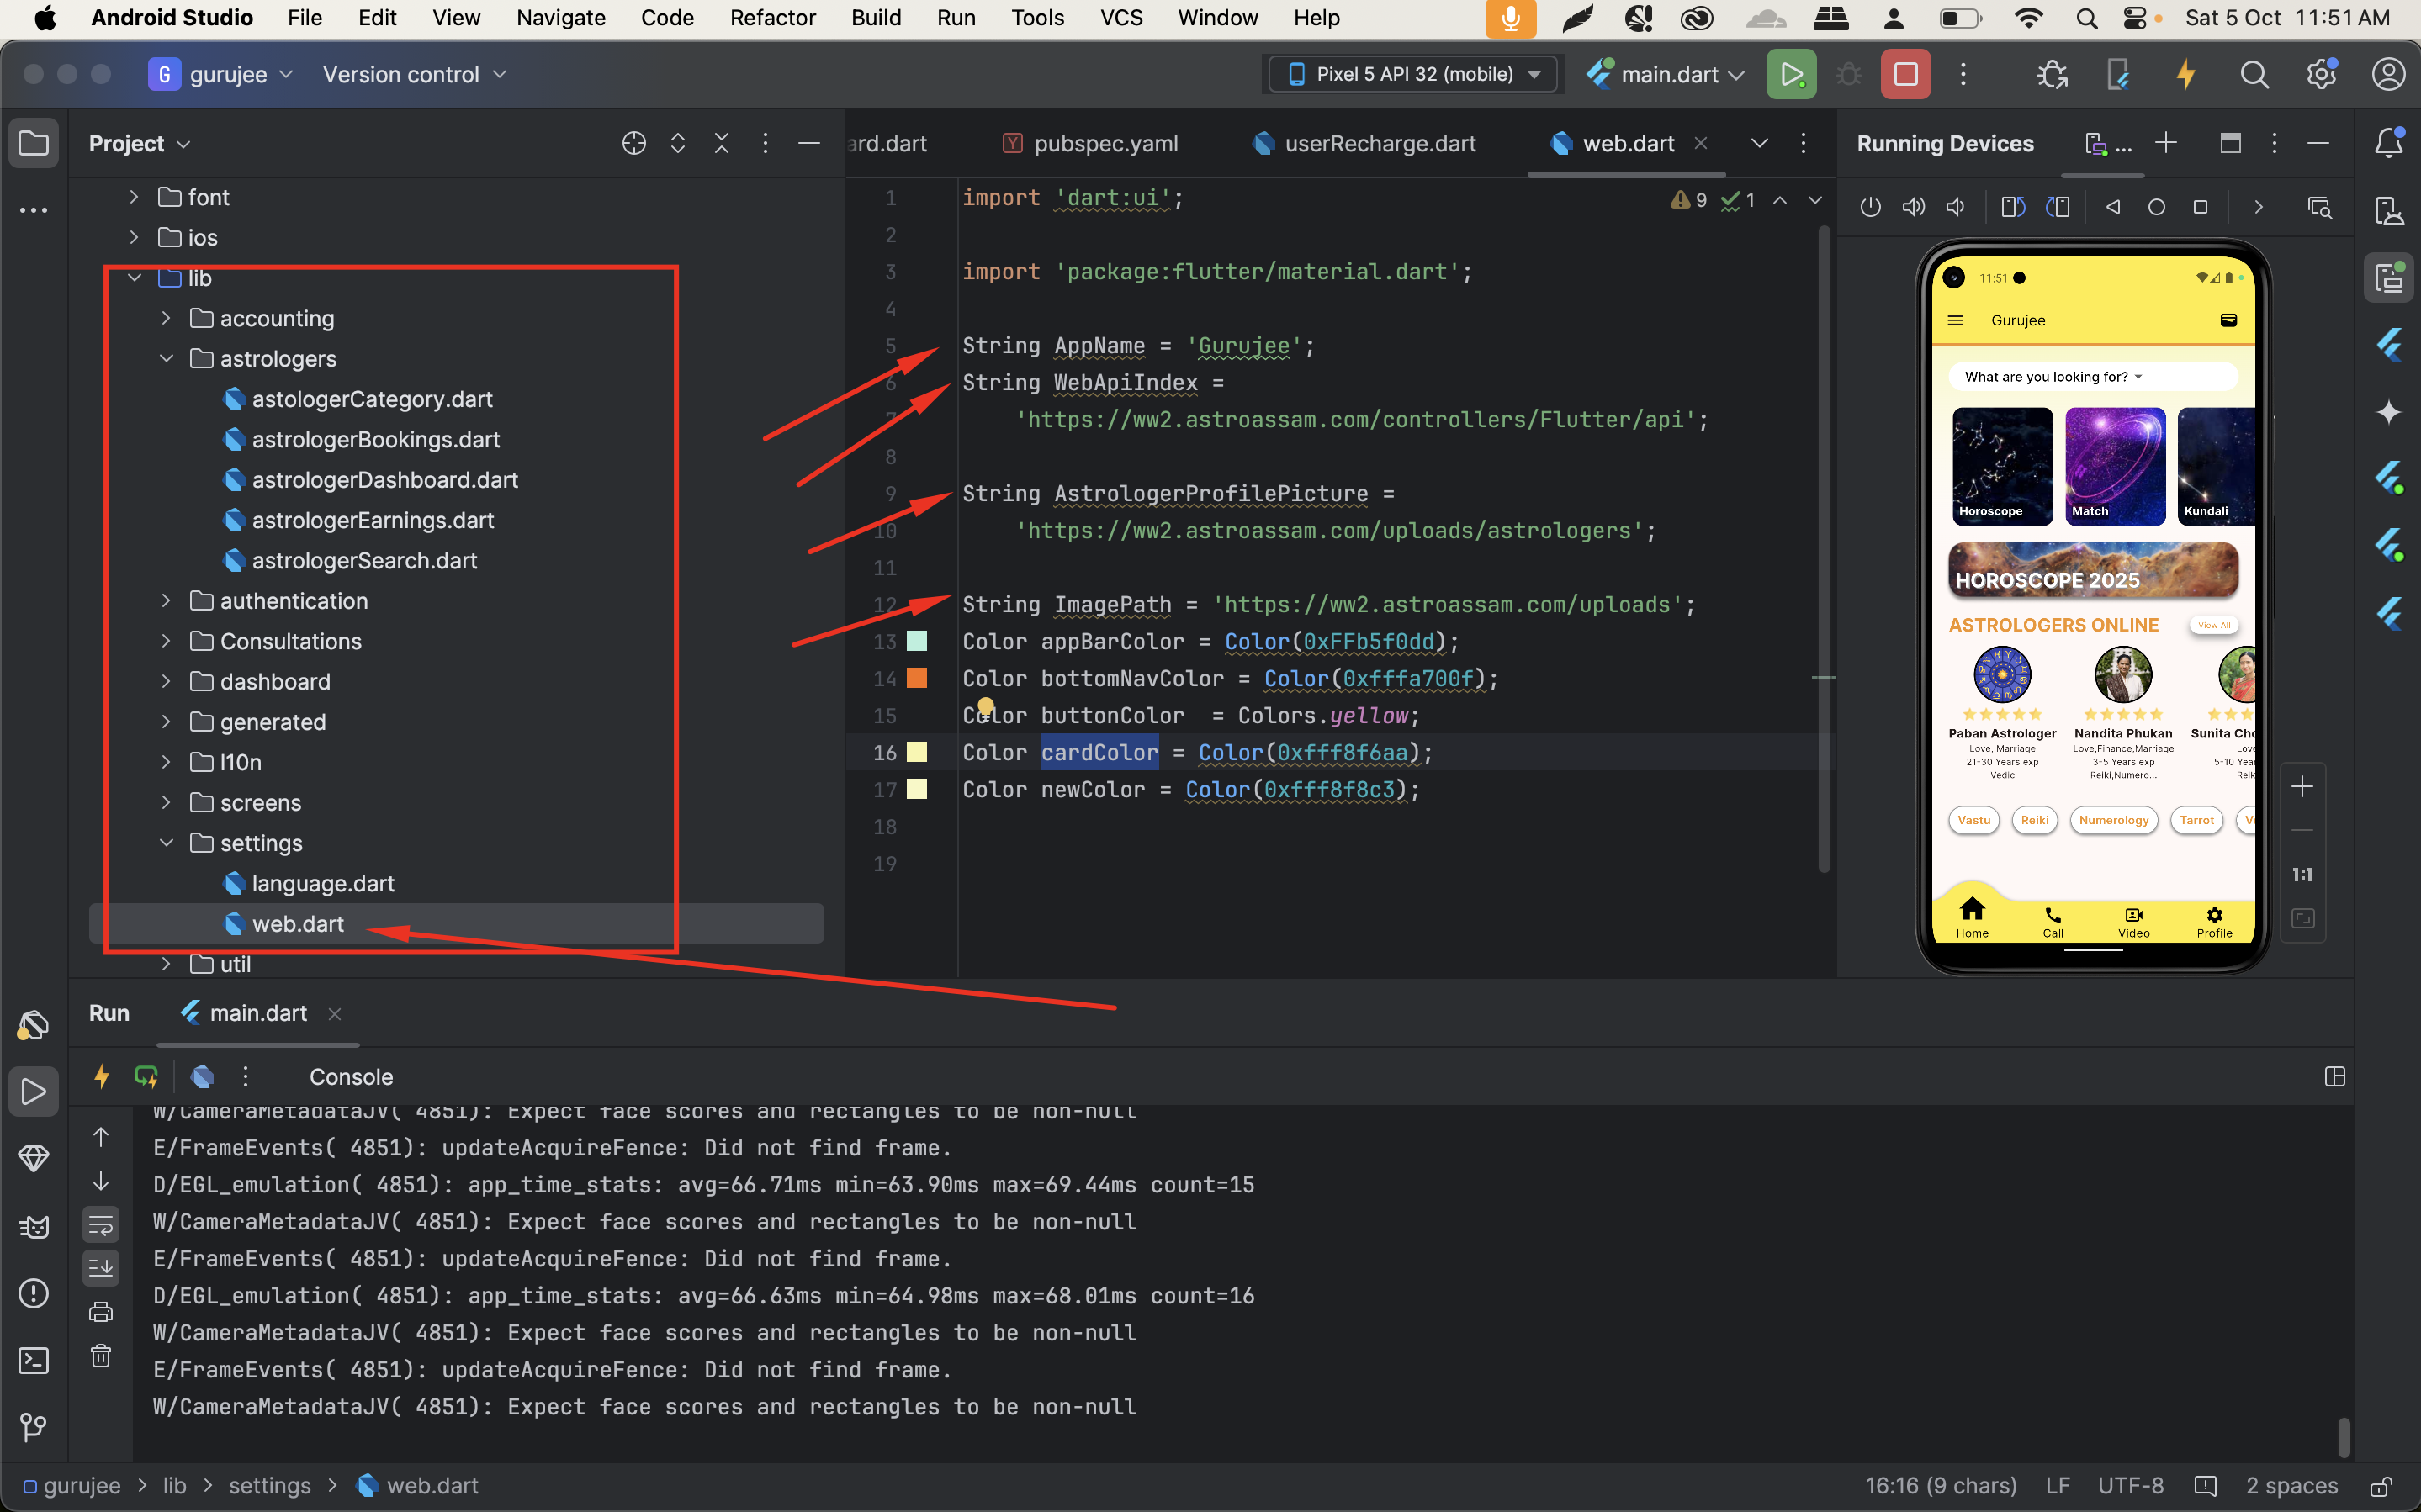
Step 10: Change App Colors And API Urls
- To do this step, go to settings > web.dart

Step 11: Update Razorpay API Key
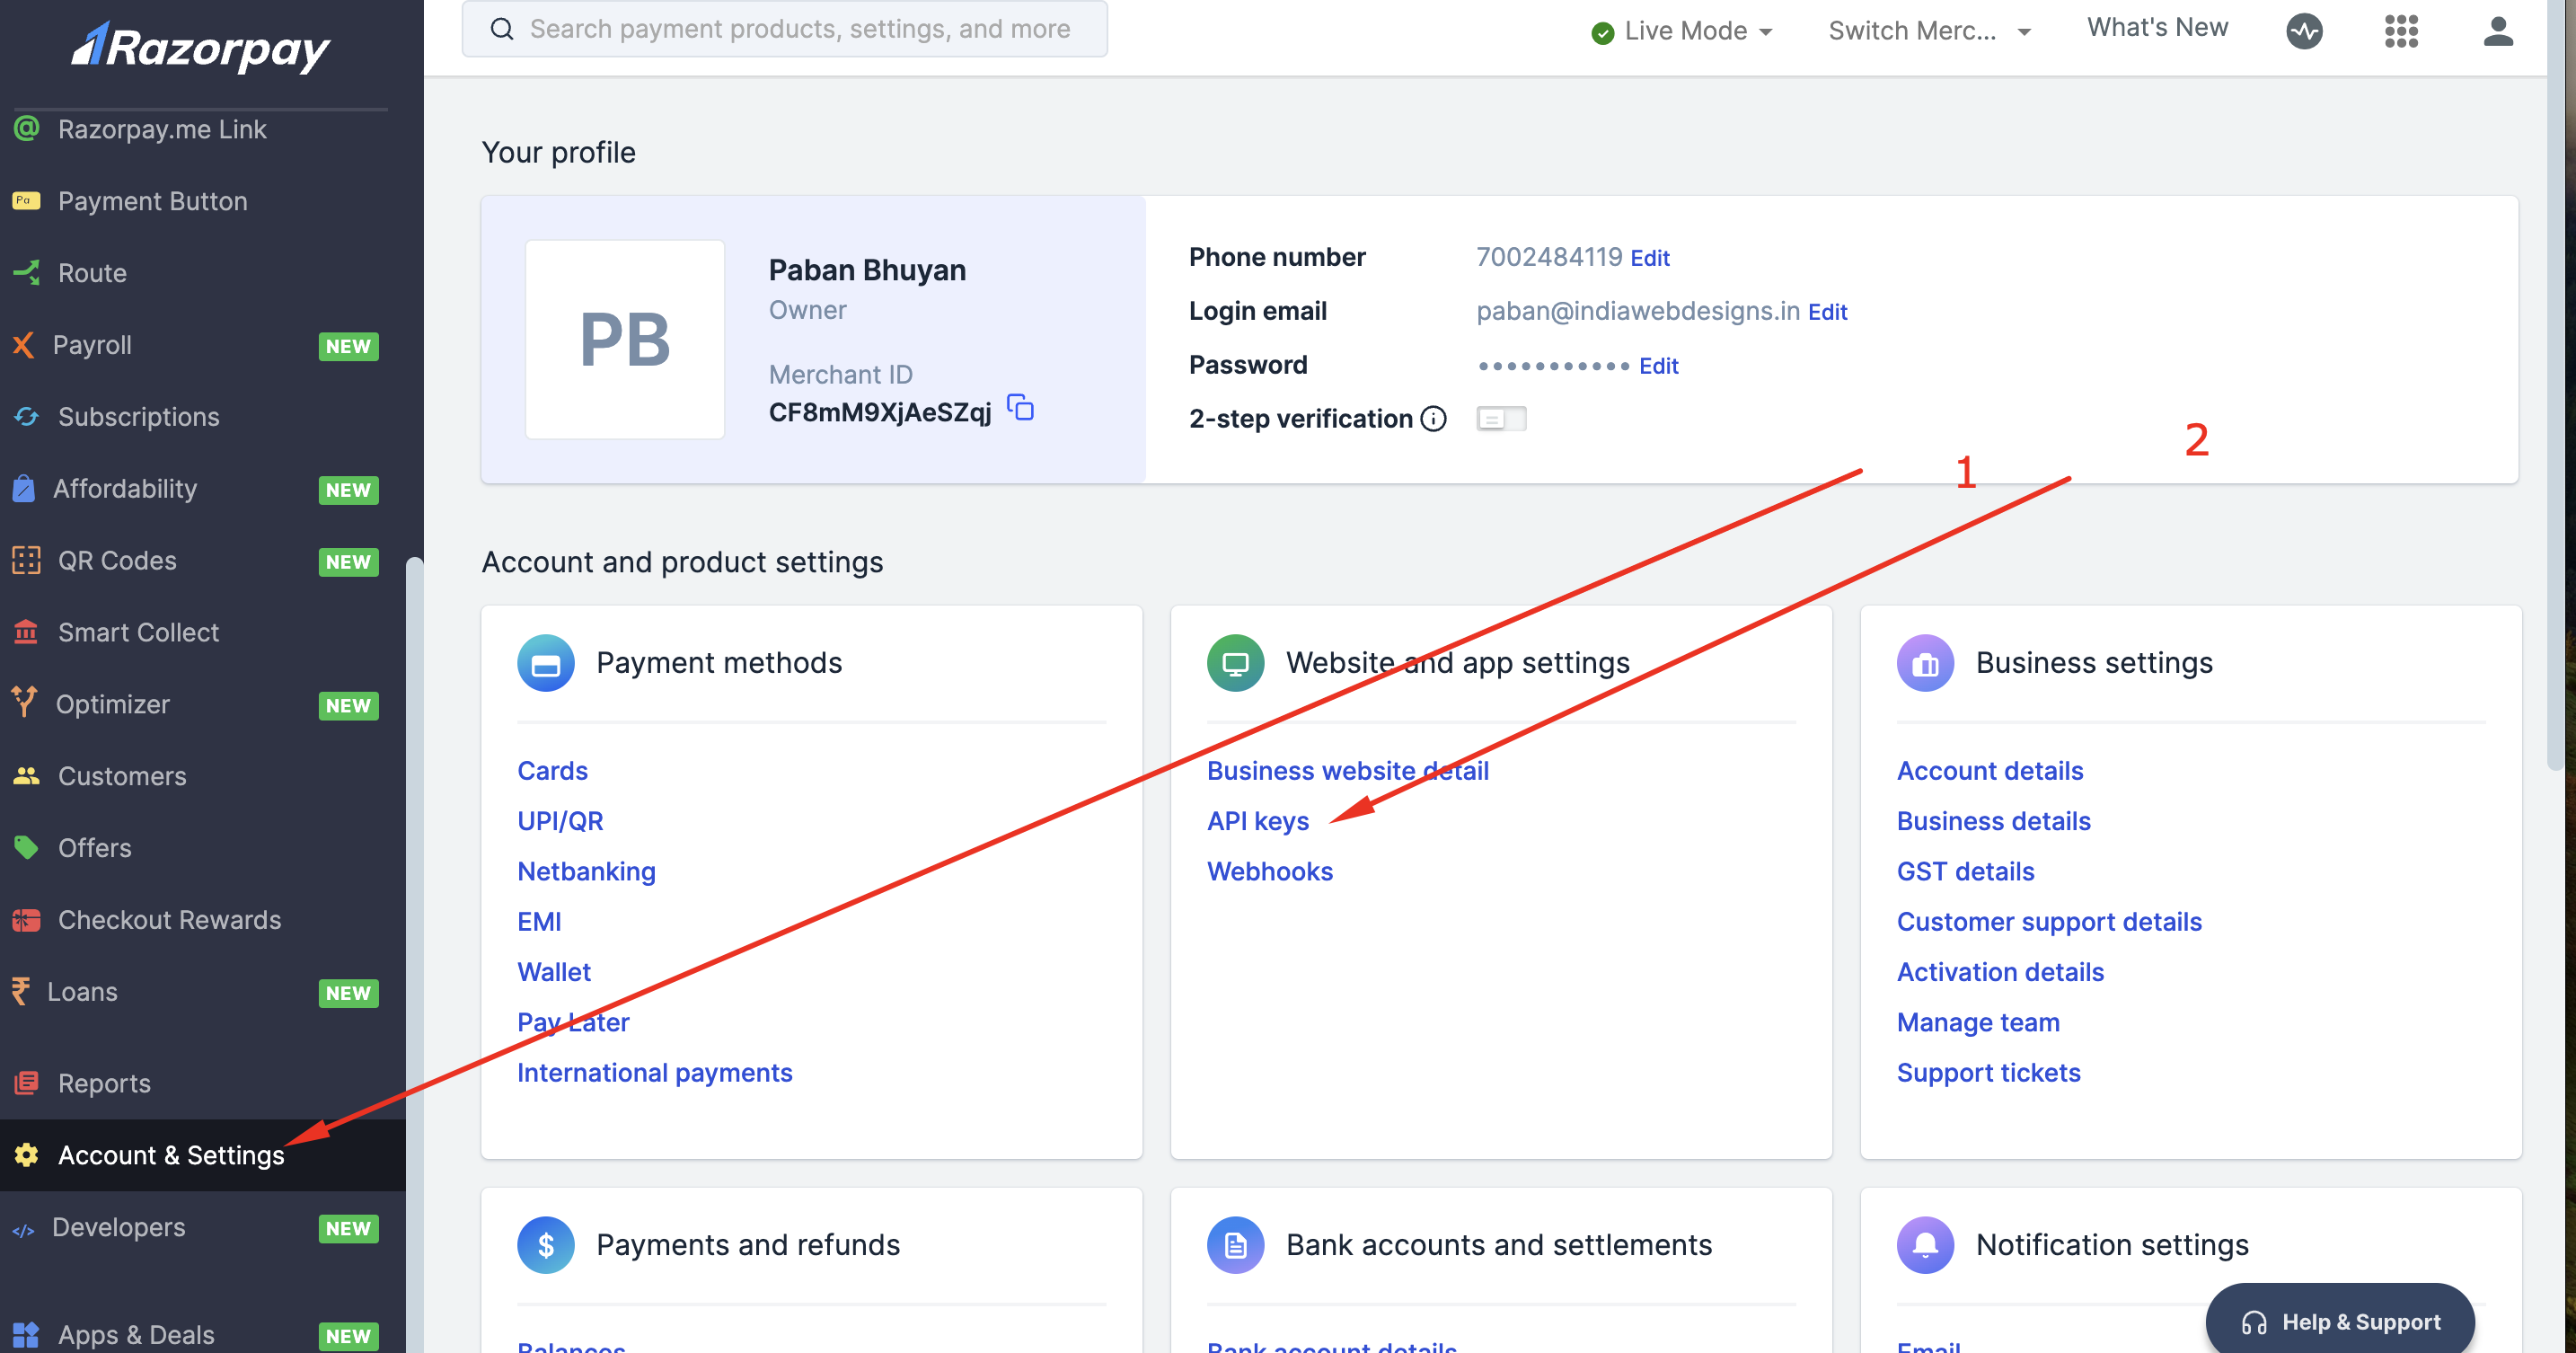
- Visit Razorpay , and create a new account.
- Go to Accounts & Settings > API Keys

- Copy the API key

- Paste the API key inside lib > wallet > userRecharge.dart

All Done!
For any query kindly WhatsApp +91 7002 484 119


